|
During the month of January 2016, Screenium 3 was featured as one of the best new apps in the Mac App Store. This featured profile may have to do with the new feature that was added that enables you to record your iOS screen. Nonetheless, Screenium 3 is definitely worth checking out. Screen Recording Options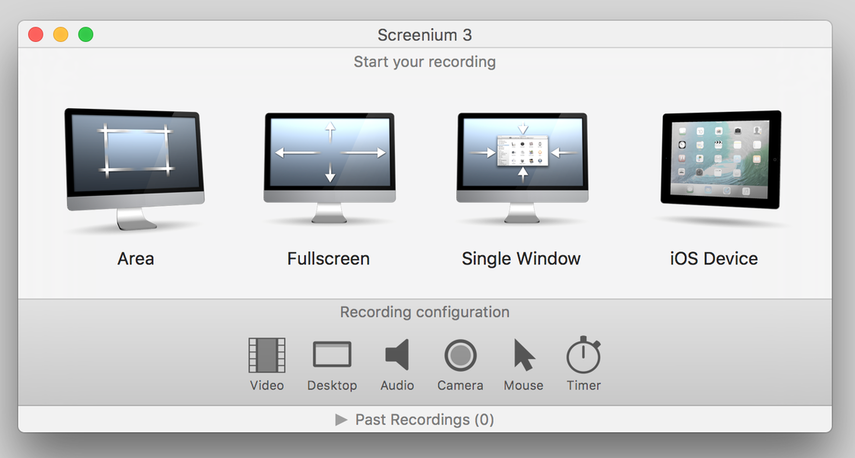 When you first open Screenium 3, you have four options for recording your screen: record a specific area, record fullscreen, record single window, and record your iOS device. These features are consistent with the leading apps in this category. Below this menu are the configurations for different aspects of the recording, including video (including things like frame rate), desktop (including the ability to show or hide desktop icons, audio (to specify audio source), camera (for the option to include facetime video), mouse (for cursor and mouse click visualizations), and timer. The latter is something I’m not accustomed to seeing; it provides the ability to specify your recording duration. Recording your screen is the key function of Screenium, and so the document set up is integral to starting new projects. Under file, you can set up a new document or “composition.” The composition by default is 1280 by 720. You can adjust the size by going to composition at the top menu and selecting “canvas size.” Here you can customize the size, and enlarge or reduce it proportionately. If you go with the default size and add an item that is larger (e.g. a video that is 1080p), you will be prompted to “leave as is” or “increase” the size of your composition to match the size of the size of the clip. Menu BarThe menu bar along the top provides a range of options for adding animations, and effects for audio and video. Templates are quick actions that enable you to add annotations and text. The Video Library gives you quick access to previous recordings and the Pictures tab enables you to import images from the Photos app. Screenium 3 also comes with the ability to add video and audio effects, animations, and voice overs. And one feature that is unique to Screenium is the generated speech option, which enables you to translate text into multiple languages as voice recordings, which can then be used to add multilingual narrations to your presentations. Other languages can also be added to existing audio tracks. 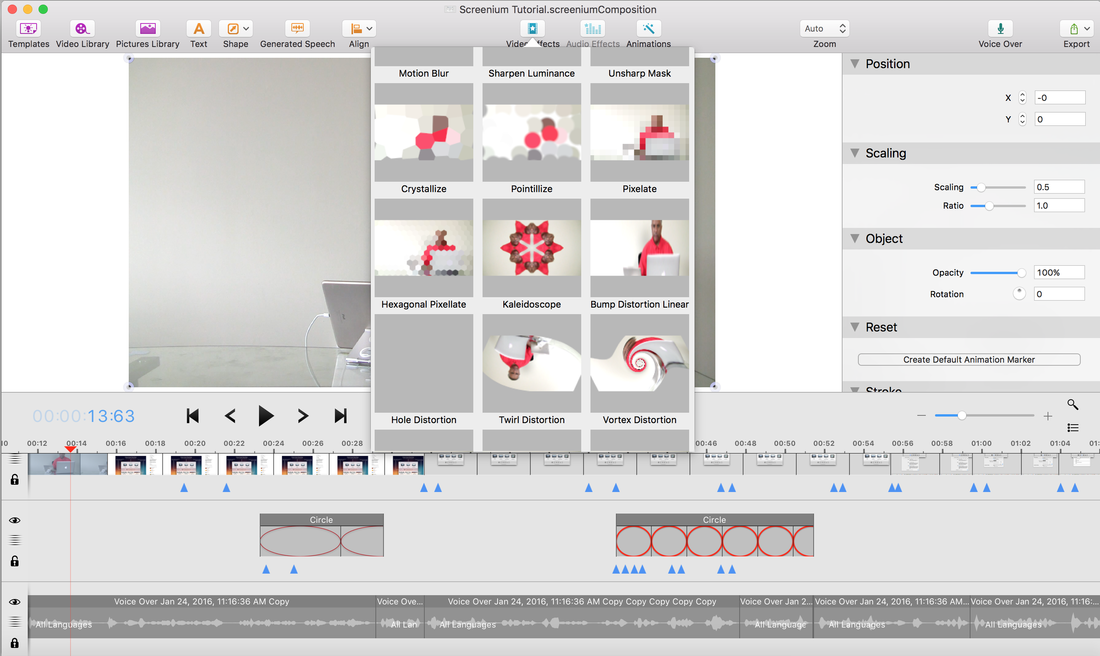 Composite EditorBelow the menu, there are three main sections: the viewer, to the left, the inspector to the right, and the timeline below. When a clip (video, photo, or audio) is added to the timeline, the viewer and/or inspector will reveal content or controls that are specific to the media selected. Below the viewer, you will find playback controls, and just to the right options to enable animations, split clips, or to delete them. 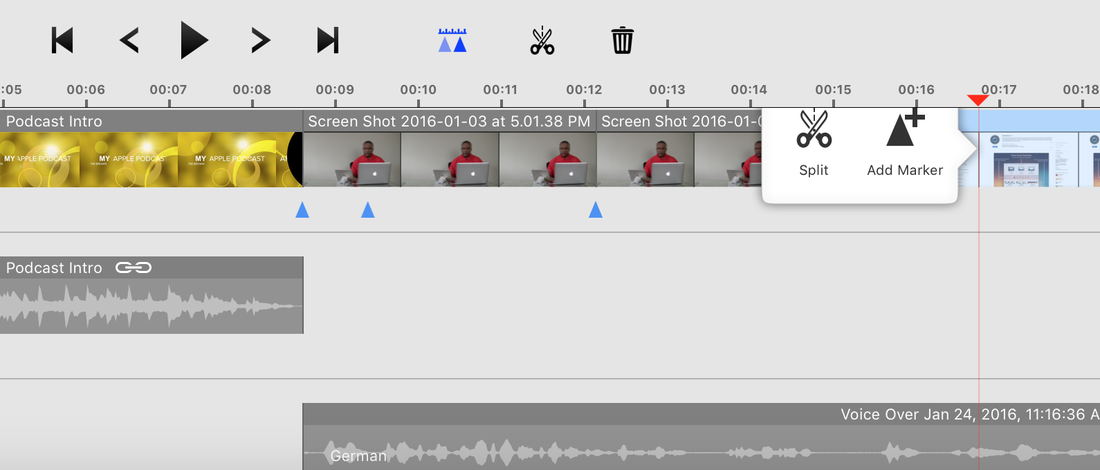 Timeline ActionsObjects in the timeline also come with added controls that provide more flexibility when setting up your animations. For example, when you move the playhead to a specific location, you can hover over your clip to add a split, add a marker, or insert a still. “Split” is equivalent to the cut tool adjacent to the playback controls; “markers” are like keyframes that mark the start and stop point of your animations, and “insert still” is equivalent to what is otherwise known as a “freeze frame.” Other FeaturesThere are some specific features that exist under the areas mentioned above that are worth highlighting separately. Under “Video Effects,” you have the option to to use the “chroma key” effect when working with green screen videos. Once selected, the chroma key controls will appear in the inspector on the right. This feature is great for podcasters who prefer more flexibility when juxtaposing the narrator with items that are being reviewed. Screenium 3 also comes with a masking tool that enables you to use any shape to mask sections of your videos or photos. Screenium 3 is a nice alternative to Screenflow and Camtasia. I encourage you to take it for a spin. Timothy Brown, Host of My Apple Podcast
0 Comments
Leave a Reply. |
Timothy Brown
Host of My Apple Podcast. Categories
All
|
 RSS Feed