|
You know, I just realized something. I seem to spend a lot time focusing on iOS but today, I’m going to focus on the Mac, more specifically, a photo editing application for the Mac called PhotoScape X. I chose PhotoScape X because it’s an application that contains a boat load of features, what you might call an all-in-one desktop photo editor. When you first open the app, you will find a menu of options along the top: Photoscape X, Viewer, Editor, Batch, Collage, Combine, CreateGif, Print, Tools, and Store. Combined, this menu comes jam-packed with a lot of functionality. 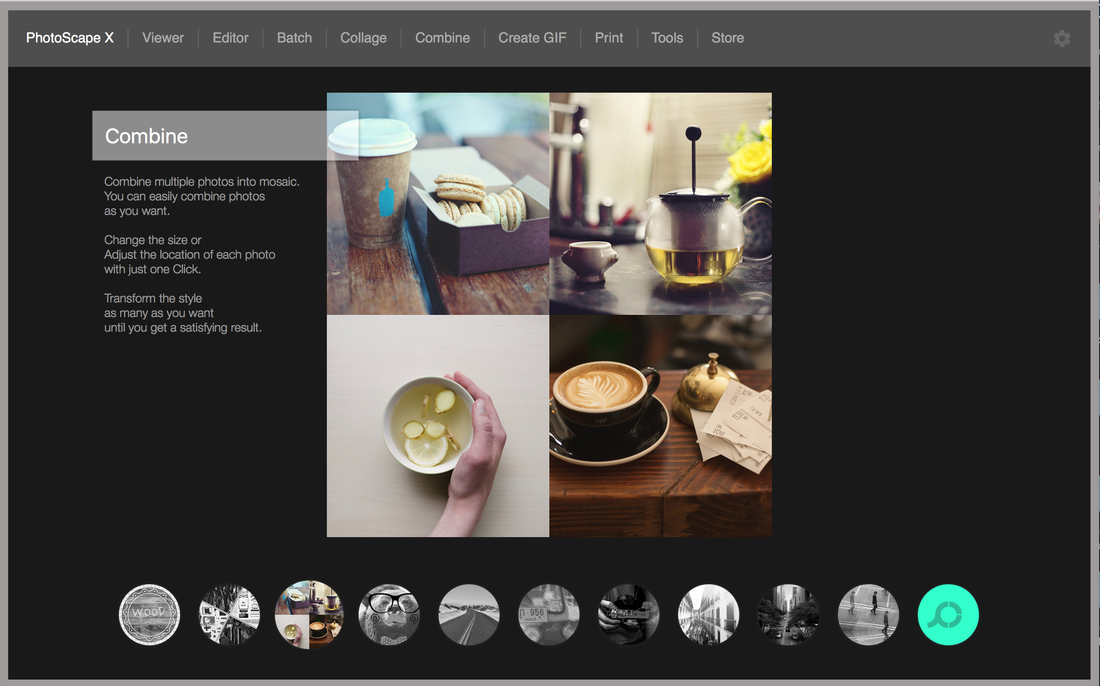 PhotoScape XRunning your cursor across the corresponding thumbnails along the bottom, you will get a glimpse of the wonderful features that come with PhotoScape X: Shape and Text, Collage, Combine, Sticker and Frame, Point Color, Cellophane, Film Effect, Light Leak, Miniature Effect, and Illusion and Reflection. This section is mainly an overview of what you can expect when you delve deeper into this amazing application. ViewerThe Viewer, simply put, is where you can view all the photos accessible on your Mac - not only what you see, but how you can view them. For example, you can view them in tile view, list view, and/or full screen. When you click on the drop down menu at the bottom right, you can organize files, alphabetically, by size, date, and so forth. You can also use the slider along the bottom to control the size of your thumbnails. The Settings icon provides some additional hidden gems. For example, you can customize your view by filling the thumbnails, or showing the file name, number, and frame. You even have the option to tilt images so they appear less uniform.  EditorUnder the Editor, you have access to your images on the left, and on the right, you have a range of menu options: Edit, Adjust, Film, Effect, Frame, Insert, and Brush. This menu is the most extensive, with a plethora of effects and alterations. Edit Edit is where you can make adjustments to the structure of your image, including Crop, Resize, Flip Horizontal, Flip Vertical, Rotate CW, Rotate CCW, Rotate (general), and Straighten. All of these features are pretty straightforward, but let’s take a closer look at the Crop and Resize options. Crop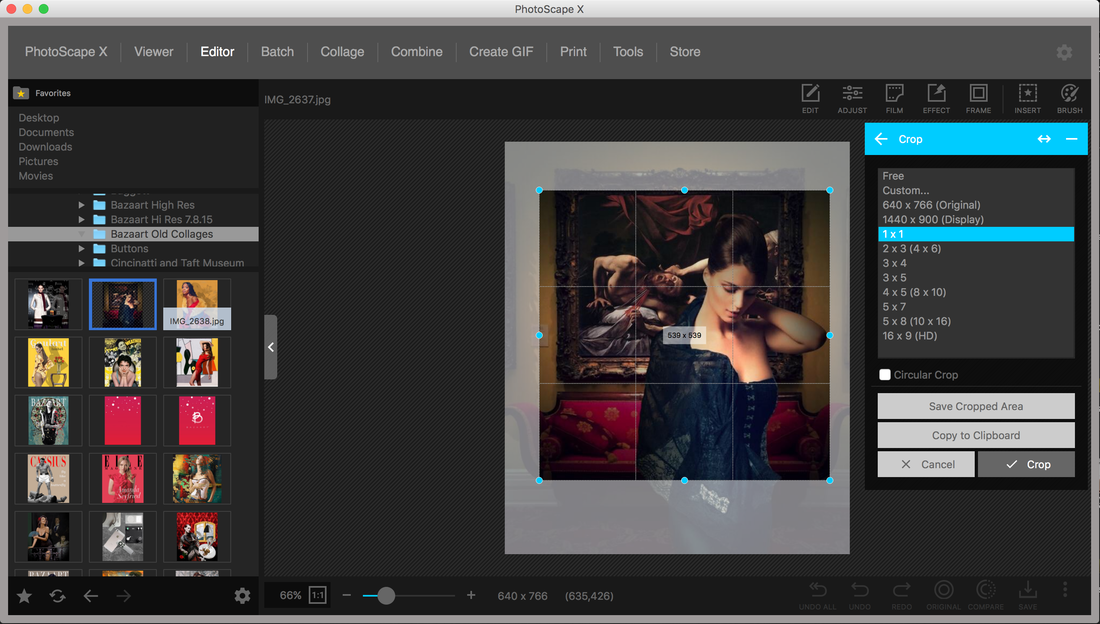 When selecting one of the aspect ratios, say 1:1 or square format, the cropping tool will automatically take on the form of a square. The same occurs when you choose 16:9. A unique option includes the ability to add a circular crop, which can then be used to add a color, pattern, or transparent background. ResizeThe resize tool enables you to increase the pixel dimension of your photo, with options to preserve the aspect ratio or to adjust the size manually by 300 percent. AdjustThe adjustment tools in PhotoScape X are what you would expect to find, the ability to control brightness, color, levels, curves, color balances, sharpen, blur, and white balance. Color Emphasis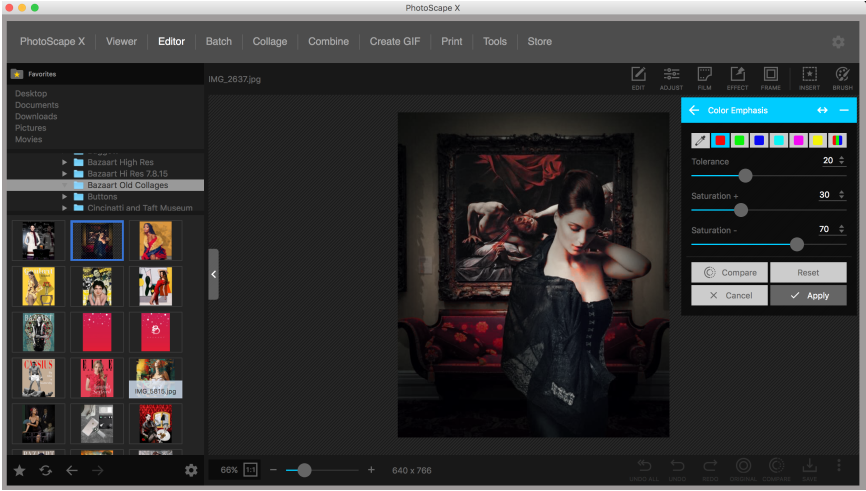 Color emphasis is how you can control point color. For example, you can select one of the color swatches to decide what color you want to emphasize; the rest of the photo remains neutral. For better control, you can use the eye drop tool to pull a color directly from the photo. You will notice throughout the option compare your changes to the original photo. FilmStill under the Editor menu is the option to add Film Effects. Here you can select a long list of thumbnails, each one representing a different film overlay; the slider along the bottom allows for further refinements. The Film Menu also includes Duotone and Light Leak options. Duotones appear monochromatic, but have hints of warm and cool colors reminiscent of different film processes. Light Leaks are quite common among photo editors, but in PhotoScape X, you can make further adjustments by using the tools below to flip and/or rotate the effects. Effects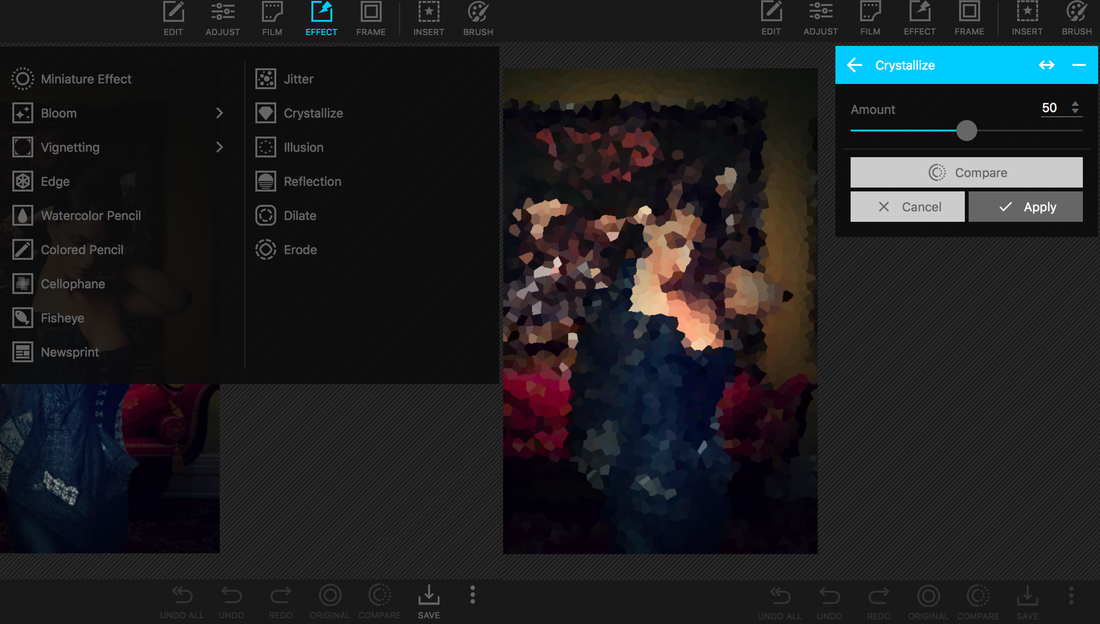 The Effect tab goes beyond film replications. The Effects include Miniature Effect, Bloom, Vignetting, Edge, Watercolor Pencil, Colored Pencil, Cellophane, Fisheye, Newsprint, Jitter, Crystallize, Illusion, Reflection, Dilate, and Erode. Miniature EffectThe Miniature Effect is what is commonly referred to as “Tilt Shift.” By tilting the focus of your images, you can isolate the focus on certain parts of your photos, while blurring the rest. As you will find in common applications like Instagram, you have a radial and linear option. CrystalizeCrystallize enables you to break your image into cubist abstractions, ranging from fine and minute rearticulations of the image to larger more abstract forms. Frames The Editor Menu also includes the ability to frame your images, with a subset of menus that include Frame, Shape, and Border. What I find most impressive is the extensive menu of options, and the ability to add colors, patterns, and transparent backgrounds. InsertThe Editor Men also includes the ability insert stickers, Images or logos, text, and various annotation markers. Each additional element that you add to your photo can be removed by clicking the “X.” An inspector menu enables you to customize colors, opacity, and line types. Brush ModeI found the brush menu to be surprising, and refreshing. For example, when you select painting at the top left, a long list of options appear, which you can brush onto your photo, including the ability to paint, add greyscale and sepia tones; brighten, deepen, darken, blur, defocus, clear skin, or apply mosaic effects. You can also correct red eye, remove mole, and/or clone sections of your photo. BatchPhotoScape X also comes with a Batch feature. Essentially, you can import multiple photos, and make adjustments to all of them at the same time. These adjustments include resizing, adjusting lighting, contrast, and clarity of the images, adding effects and even adding frames and shapes - all of this done to multiple photos at the same time. Collage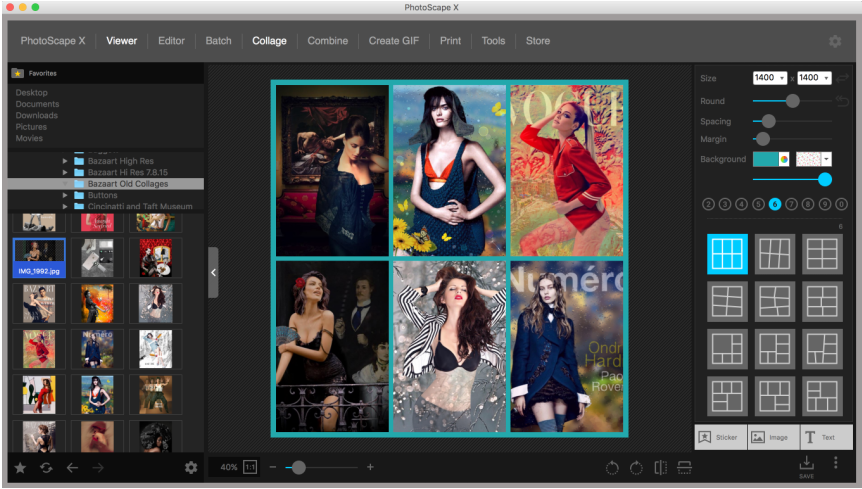 Another feature that typically comes in the form of a stand-alone app is the Collage feature. Rather than provide this feature as a simple add-on, PhotoScape built in a full-fledge collage creation tool. As you can see there are so many templates at your disposal that your options are limitless. Not only do you have ten menus to choose from, but each collage comes wth the ability to customize the size of the collage, control corners and margins, adjust colors, as well as, customize backgrounds. You can also add layers in the form of stickers, images, and text. Wow!! CombineCombine is another menu option that is a variant on the collage feature. For example, you can import multiple photos and combine them, either in vertical and horizontal displays or in tile view. Furthermore, the combo feature comes with the same adjustment tools as the collage feature, refining the margins, rounding the corners, adding a background color, and changing the canvas size of your final export. Think of how handy this feature could be when updating header images for your social media pages or personal websites. Animated GifsWith PhotoScape X, you can also create Gifs. I kid you not. And the features are quite impressive. Let’s take a look. Select a group of images from your library and drag them onto the stage. On the righthand side, you will find several ways to customize your Gif. By default, each image will begin to flash at intervals of 0.50 seconds. You can easily change this by selecting “Change Time” and then “Change All Frames.” “No Effect” is selected by default, but you can change this by clicking on “Change Effect” and adding the “Slide” transitions” or “Fade” and “Zoom.” Text can also be added to your Gif, including the ability to control the size and position of the text. Print is the next menu option. This seems pretty straight forward at first, but on closer inspection, you will notice that even this feature comes with levels of customization that you would not expect from a photo editor. From the this menu, you can select the printer, paper size, portrait or landscape, and/or print a portrait shot or thumbnails. You can choose paper or image full, even select the DPI, ranging from 72 to 1200. ToolsI know what your thinking. Have I moved on to another application or am I still describing PhotoScape X. Trust me, I thought the same thing.
Next on the Menu bar is “Tools.” Here you can take screenshots, which can import into PhotoScape X, select a built-in color picker, and rename files in bulk. And last, but not least, the Store enables you to upgrade to the Pro version and/or buy additional stickers and photo decorations. And that is PhotoScape X, the all-in-photo editor for the Mac. Check it out. The app is free (which is absolutely crazy), but comes with in-app purchases, if you want to upgrade to pro, and that is exactly what you should do because this app is amazing!!
41 Comments
Francesca
10/1/2015 06:31:00 pm
I think I'm being dense; I can't seem to find the color emphasis. Is it under Edit or Effects? Or maybe Brush? Thanks--your post is really helpful.
Jil
10/11/2015 12:06:55 pm
How do I save a collage in an 8 1/2 x 11 (portrait mode)? I have created a collage for a yearbook tribute page and it needs to be in portrait mode (not a square). Any ideas on how to do this?
Shanna
12/27/2015 08:12:59 pm
Can you upload pictures from your camera directly to photoscape x?
Tim
1/7/2016 05:52:39 pm
This feature is not available. I will recommend it to the developers. Tim
Laura
1/7/2016 03:33:27 pm
I can't access my photos from photoscape. What am I doing wrong?
Glenn
1/9/2016 06:51:36 am
I cannot find red eye correction on my free version of photoscapex, is it only on the paid version? I no longer have the free version, so I'm not sure if I can solve your problem. Normally, you will go to "Editor" and select the "Brush" option. "Paint" will appear as the first option under "Brush." Click on "Paint" and another list of options will appear, including "Red Eye Correction."
Glenn
1/10/2016 04:35:08 am
Thank you so much Tim, can't believe I spent so much time and couldn't find it!
Sandra
3/4/2016 02:02:38 pm
Hey there! I'm fairly new to the tech world involving my photography and I'm having trouble with saving these photos out of softwares (pic monkey, pixlr, and now photoscape). Since I have paid for the pro version of PScape, I'd like to know more specifically about handling my problem there! Luckily I found this :) 8/5/2016 08:40:32 pm
I LOVE this program. Even though Aperture is no longer supported by Apple (big mistake!) I still use it because it has the best DAM. I would love to be able to "round trip" from Aperture to PhotoScape X which is a remarkable program. As of now, I'm not sure how to save my work and get it back to Aperture as a tiff. It's pretty labor intensive to save to PhotoScape, find the pic in the finder and import it to Aperture. I've taken to using a thumb drive to contain the pics and then import them into Aperture. There has to be a better way. Ideally, I love PhotoScape to rest in Aperture under "edit with plug-ins." 9/5/2016 05:09:16 pm
Hello there,
Anne
9/6/2016 06:03:33 am
Thank you, Tim. I should have remembered that from when I was on a PC. Different layout now that I'm on the Mac and it threw me. Thanks so much. 9/6/2016 02:54:20 pm
When you go to "save" your picture, there's a little dpi box on the lower
Hi :) I've been using this program for years on Windows but now that I made the change to Mac and downloaded the X version of Photoscape, I've found that when adding images to an original project, this pics appear with an extremely low quality, even though they are high resolution images on top of another high resolution image. (I don't know if I'm making any sense, but it's a little bit as if I was doing a "freestyle" collage on the editor menu).
yael
12/20/2016 01:39:09 pm
hi, I have a Mac and I do not seem to have the options you are looking for when trying to print from Photoscape X. I can only control the size and dpi. I recommend saving your file to your computer and opening it in another app that brings up to dialog options you are looking for.
yael
12/23/2016 03:26:46 pm
alright, thanks Tim!
Michael
1/31/2017 02:37:52 pm
Hi, Can anybody tell me howe I can change the printer settings for photos to 'best' when using PhotoScape X? I can only seem to just print when hitting the print button with no settings options available.
Tim
1/31/2017 07:54:08 pm
I recommend that you not spend time trying to figure this out with Photoscape X. The option is not available. Just save your final project to your computer, open in Preview and print it that way.
DIANA
2/1/2017 01:04:29 pm
how can i increase the size(kb) of an image without changing the dimensions
Tim
2/1/2017 03:38:41 pm
I recommend changing the dpi.
Ken A.
3/14/2017 11:02:38 am
When saving edited photos to Mac...my images in the saved version are different in color than the edited version. Can anyone help? The tones in the saved files when viewing on Preview are warmer tones. Ugh. Now it's a guessing game with how my saved files will appear. Not good.
Sarah
4/23/2017 01:39:17 pm
How do I resize the image so that when I upload photo to Instagram the high quality remains? 6/22/2017 08:35:53 pm
Hi - I've bought the full version on an old pc and need to know how to transfer it ( without re-purchasing it ) to my new pc - both windows 10.
Steve Shaw
6/27/2017 10:51:46 am
Hi, Having trouble with resizing. I need my photo with a font overlay to be a good resolution when exploded to a finished size (when printed) of 650mm square. This was a high resolution photo and the font was from this program. I noted that your information said resize to any size?
Tim
6/27/2017 12:30:20 pm
Go to "Edit" and look for "resize"
Dena Steinberg
4/23/2018 04:32:40 pm
Please tell me how to save my file in a larger size as I have customer who wants to blow up work onto a large canvas....I enjoy the program although sometimes after zooming in it saves things i do not want and have had problems with this...Yours Truly Dena Steinberg
Hi Dena:
David
10/29/2018 05:08:16 pm
I was trying to use two of my photos to make a double exposure using the free version of Photoscape X. Just by accident I created a very interesting image that incorporates both of the photos that I was trying to overlap, plus some very vivid colors . Unfortunately I don't know how I did it . If I sent you the two original images and the combined image do you think you could tell me how it was done? I'd like to make more of these combined images, but I don't seem to be able to repeat the process. 11/10/2020 12:56:48 pm
Hi,
Mike
12/20/2020 12:22:06 am
Hey Lots of good advice and info here, but nothing for me at the moment. I have put some pics into a project saving file, but know I can't seem to get them into another file or get them to copy on to a jump drive so I can print them out. Can you help?
mike
12/20/2020 06:42:40 pm
Hi again, Yes I know it has both but I cannot find a way to download the pics in the project option. They just keep coming up as a photoscape x file. So I converted the ones I had done to save as and that seems to work fine, But now I have bunch inn the project option that I can't get at. I am trying to put them on my desktop as jpegs or transfer them to a jump drive and I can't seem to be able to figure out how. I hope this makes more sense. Leave a Reply. |
Timothy Brown
Host of My Apple Podcast. Categories
All
|
 RSS Feed