|
Timothy Paul Brown, Host of My Apple Podcast You may happen to be one of those individuals who periodically comes across the option to save a document or photo to iTunes. I was reminded of how frequent this option presents itself when I tried to retrieve an audio file that I created with the application "Loopy HD." As most iOS users can attest, a challenge that we often encounter is where to save our files when they cannot be saved to the camera roll. Aside from photographs and videos, all other file types fall into this category. Music files happen to be one of the them. Most music applications will offer several options: 1. Save to other cloud based services like Google Drive, Dropbox, and One Drive. On some rare occasions, you may also be provided with an option to save to iCloud Drive (e.g. Djay 2). 2. Email the file 3. Share the file to social media (YouTube, Twitter, Facebook, SoundCloud) 4. Save to iTunes The fourth one is probably the least popular option, mainly because it is not as easy to figure out. iTunes File SharingSharing your files to iTunes simply means that you are sharing files to your computer. In order to do this, you must begin by opening iTunes on your computer. Using the appropriate adapter, connect your iPhone or iPad. You will notice a small iPhone and iPad icon in the top left corner, just to the right of the iTunes icons for music, video, etc. (see figure 1). 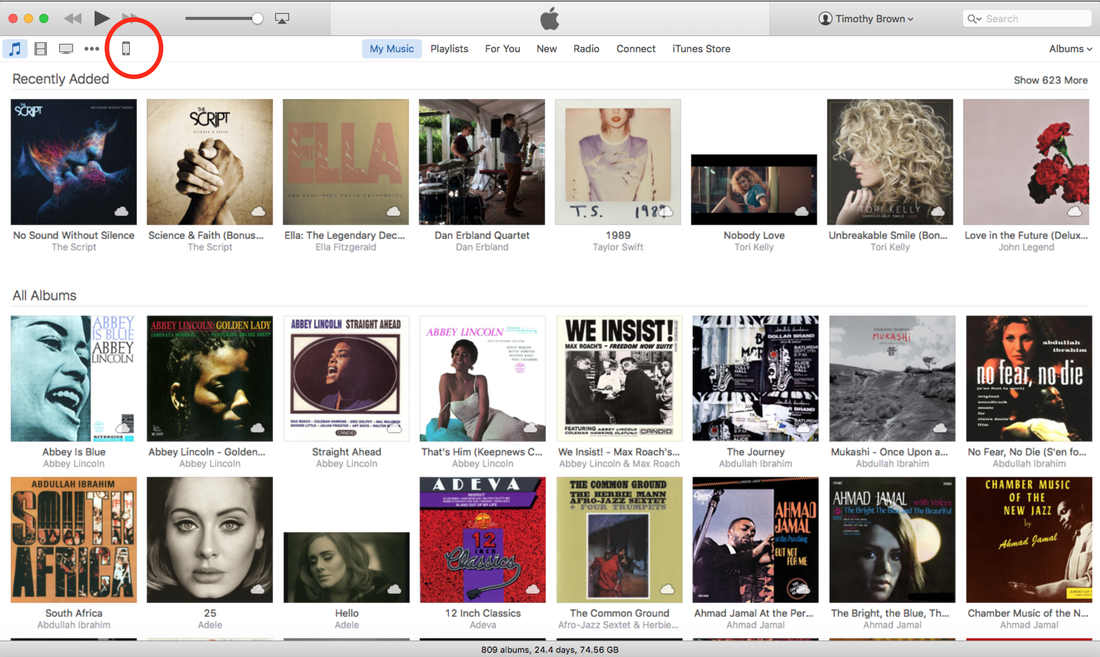 Figure 1 Click on the device icon and then select "Apps" in the left-hand column. Immediately to your right, you will see a list of all your apps, including screens shots of each iPhone screen to the right (see figure 2). 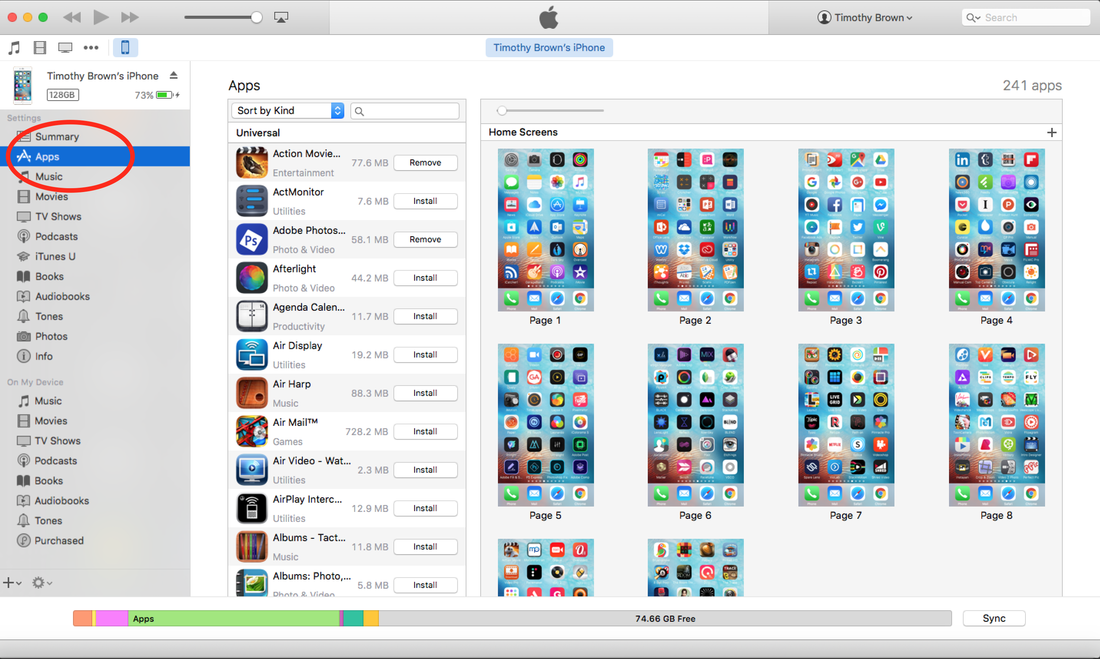 Figure 2 In order to access the files stored on your iPad, scroll down to the second section called "File Sharing." You will find two panels labelled "Apps" (on the left) and "Documents" (on the right). In the "Apps" section, scroll down until you find the application you are looking for. Once you find it, click on it (see figure 3). 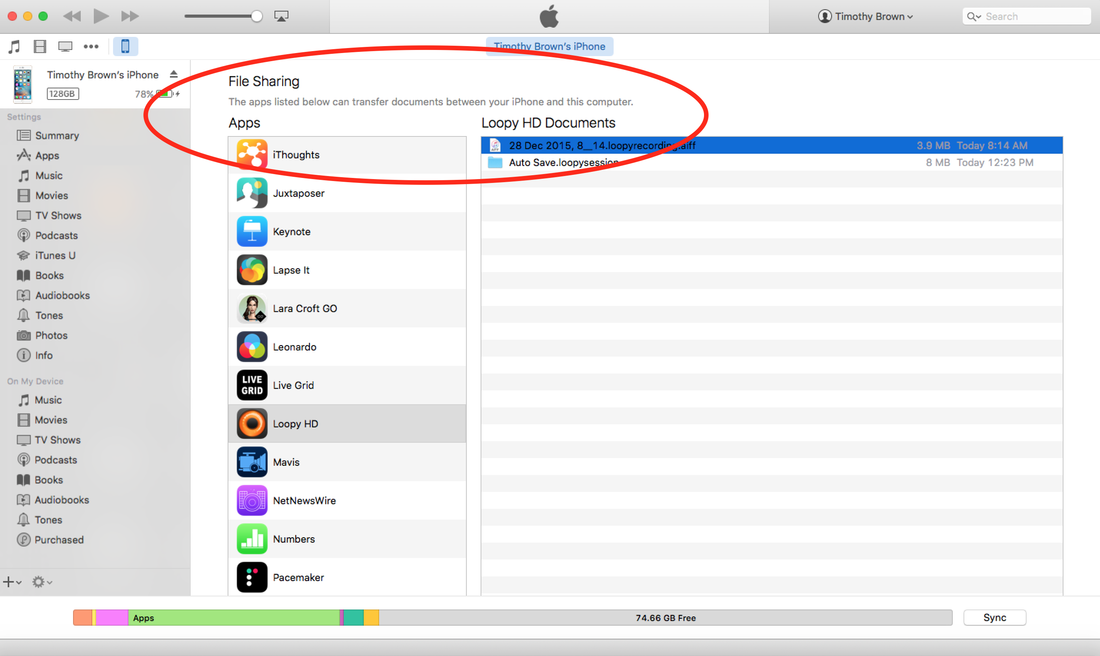 Figure 3 At first, you may not notice anything. The right panel may appear blank. Move your cursor to the far right, just beyond the "Documents" section, and scroll upwards until you find the list of files that were saved locally to your iPhone or iPad. In this case (see figure 3), the heading was changed to "Loopy HD Documents" to designate the app that was selected. Next, select the file or files you want to save, move your cursor once again to the far right and scroll down until you see "add..." and "save to...". The former will let you import files to an app (e.g. I can add sound files from my computer to Loopy HD), and the latter will give you the option to save the selected files to your computer. You can also delete files from the app by entering command + A to select all the files or hold down the command key and manually select the files you want to delete. Press the delete key on your computer and then select "delete" from the pop-up dialog window.
And that is my tip on iTunes File Sharing.
0 Comments
Leave a Reply. |

AuthorMy name is Timothy Paul Brown and I'm the host and chief editor for My Apple Podcast. Archives
September 2017
Categories |
 RSS Feed