LUMAFUSION BY LUMATOUCH
by Timothy P. Brown, My Apple Podcast, January 8, 2018
LumaFusion by LumaTouch is the most advanced and comprehensive video editor for iOS. Far exceeding the expectations of other video editors like iMovie, LumaFusion lets you manage multiple projects, customize project settings, switch between flexible layouts, and combine multiple audio and video tracks. This robust infrastructure provides the framework for making a wide range of edits, including timeline controls for layering and integrating content, and various adjustment tools for framing your composition, controlling track speed, modifying audio levels, and applying a variety of colors and effects. In this review, I offer you a practical walk-through of the basic features, so that you can get a sense of what is possible with LumaFusion.
The Basic Layout
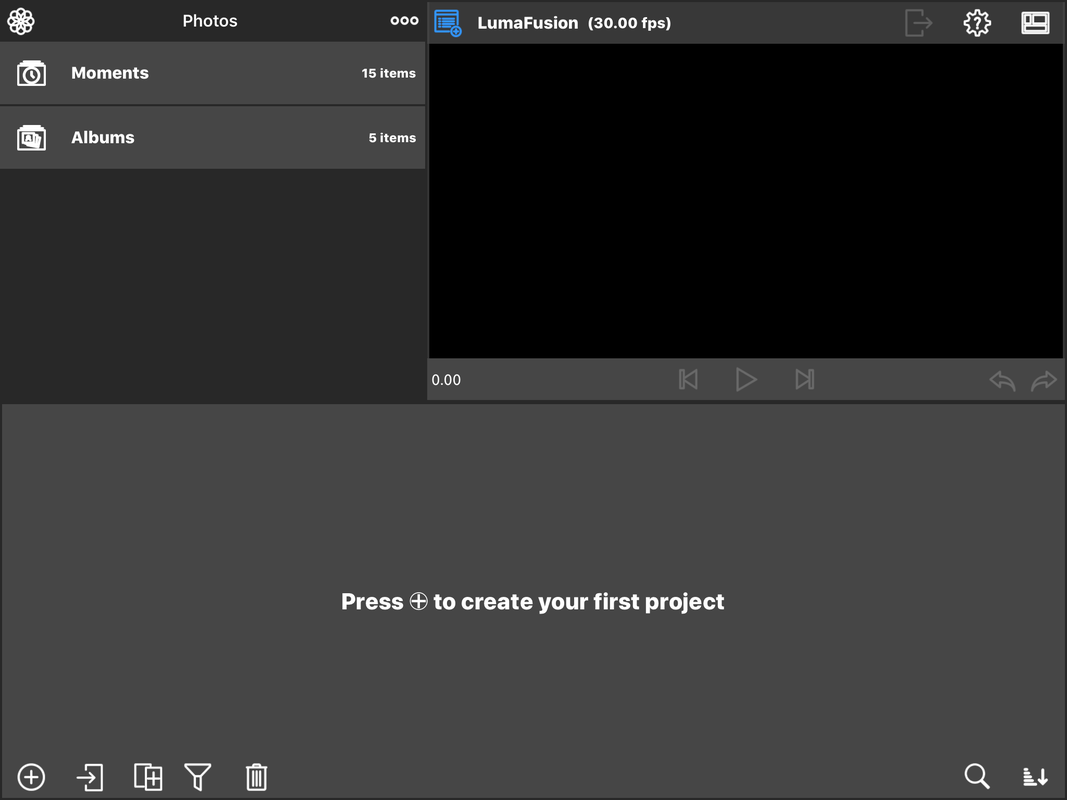
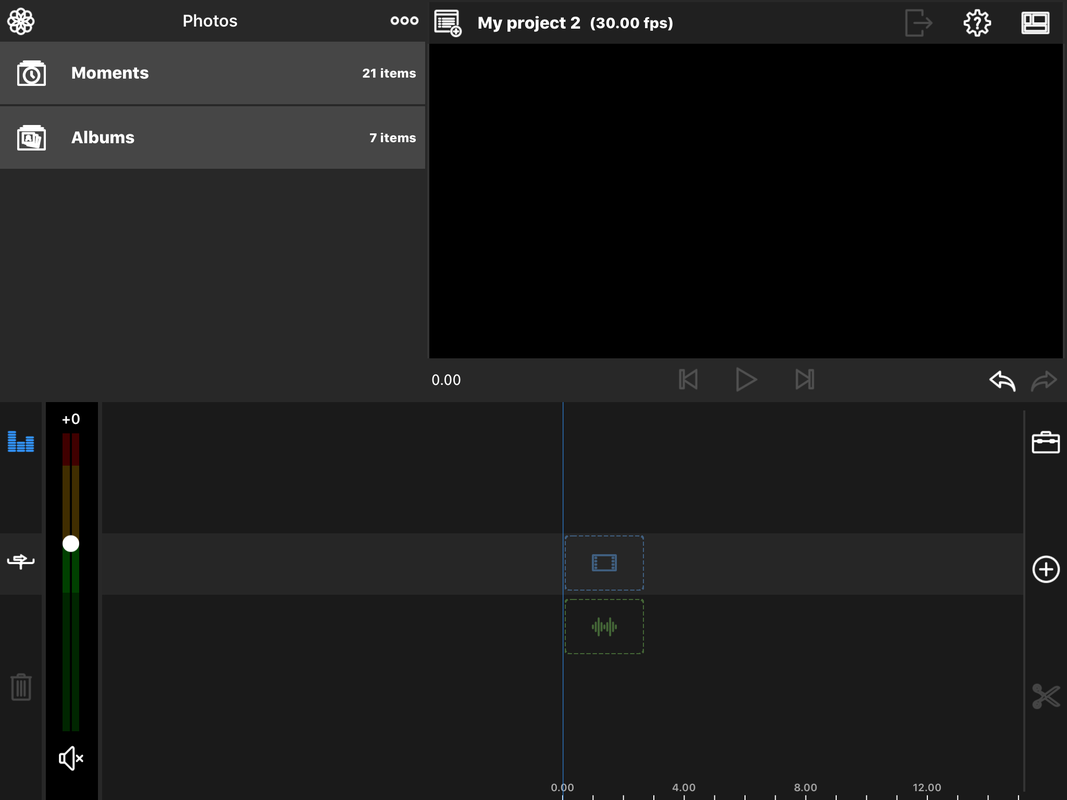
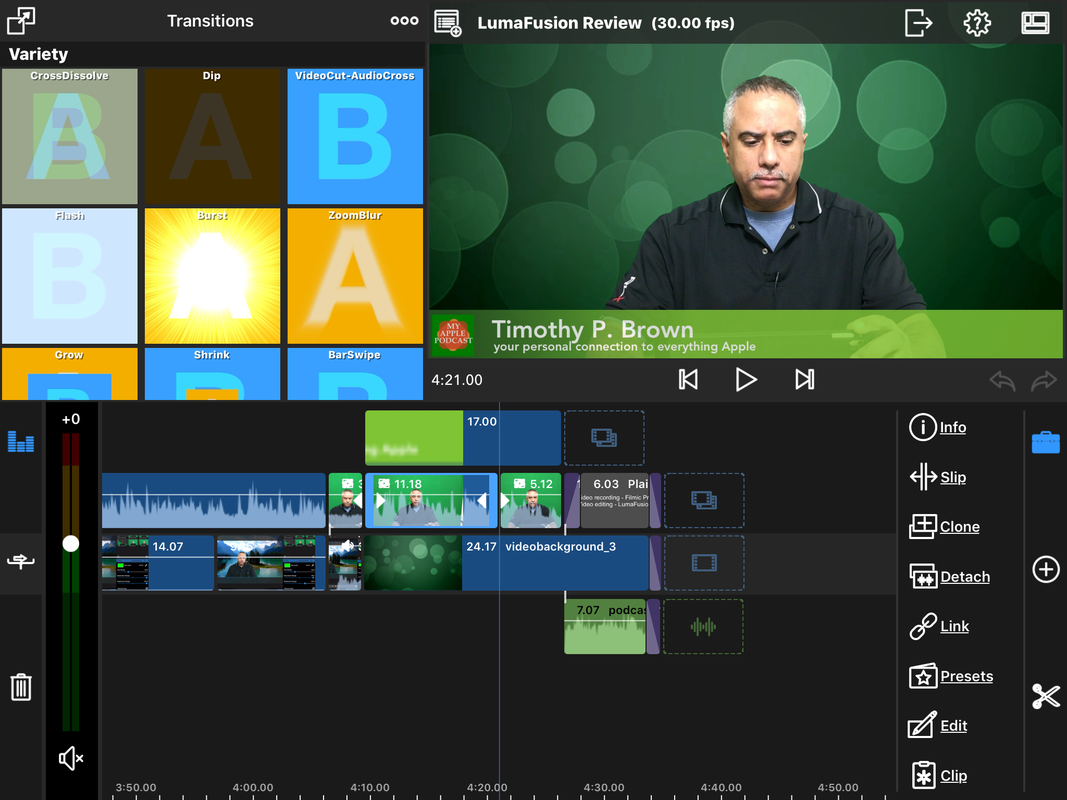
Upon opening a mobile application, it can sometimes be a challenge figuring out where to begin, but LumaFusion comes with a simple design that is intuitive and easy to navigate. The basic layout of LumaFusion consists of three browsers: the project browser, source browser, and the main viewer. The project browser is where you maintain a list of all existing projects. The source browser is where you will find source media that is imported into Lumafusion, such as photos and videos, along with an inventory of assets that come with the app, such as titles, transitions, and royalty free music samples. The viewer window is where you preview assets from the source browser and any assets added to the timeline. Upon opening a project, the same tripartite structure is maintained, replacing the project browser along the bottom with the timeline editor.
(LEFT) SOURCE BROWSER, PROJECT BROWSER, WINDOW VIEWER; (RIGHT) SOURCE BROWSER, TIMELINE, AND WINDOW VIEWER
Project Browser
The project browser displays a list of projects and the toolbar along the bottom provides various ways to set up and manage projects. Beginning at the bottom left, the plus symbol (+) enables you to start a new project, the document/arrow icon opens existing projects, the double document icon with plus symbol duplicates an existing project, and the newly added funnel icon consolidates all media associated with a given project. The trash icon deletes projects, so you want to use caution when performing this function. As an alternative to consolidating projects, you also have the option to save projects to one of your cloud-based services as back up (see "Exporting Projects").
PROJECT MANAGER TOOLBAR
On the bottom right side of the tool bar is a search icon which can be used to find projects by title, frame rate, and aspect ratio. The sorting icon on the far right allows you to sort projects by color, title, notes, creation date, modified date, duration, frame rate, and aspect ratio.
PROJECT METADATA
Once you have begun to add projects to the project browser area, you will notice several layers of information that help you identify and define the specific features of each project. For example, each project contains a color-coded identifier, project title, project notes, duration, frames per second, and project dates and times.
Settings and Help
The first step to figuring out how an app works is finding the help menu. Typically, you can find it by looking for the (I) icon, a question mark, or the settings icon. Some apps make these icons difficult to find, but in LumaFusion the settings icon is easily identifiable and a lot of information is available at your disposal.
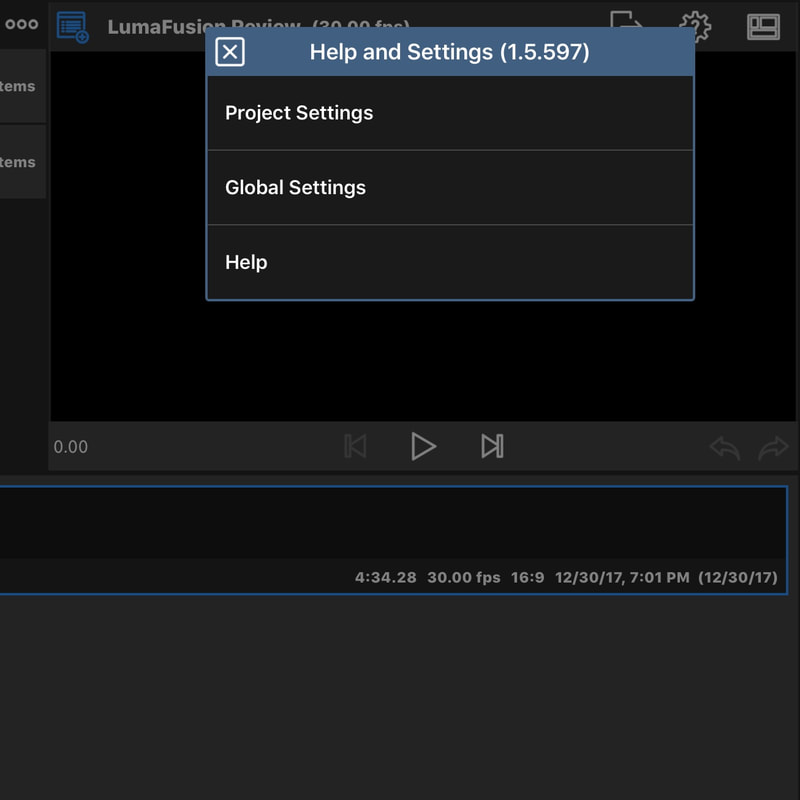
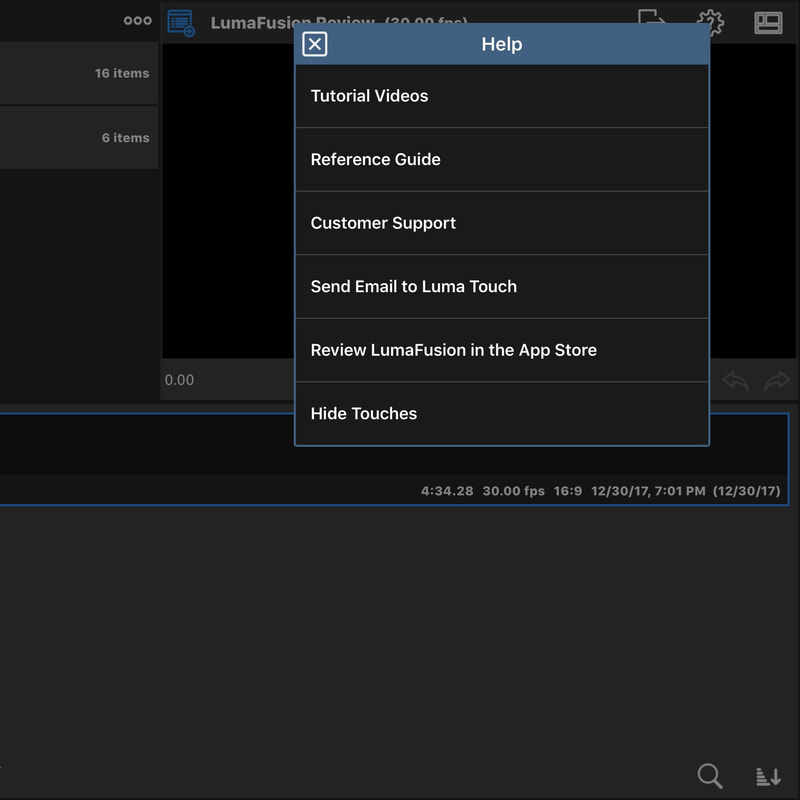
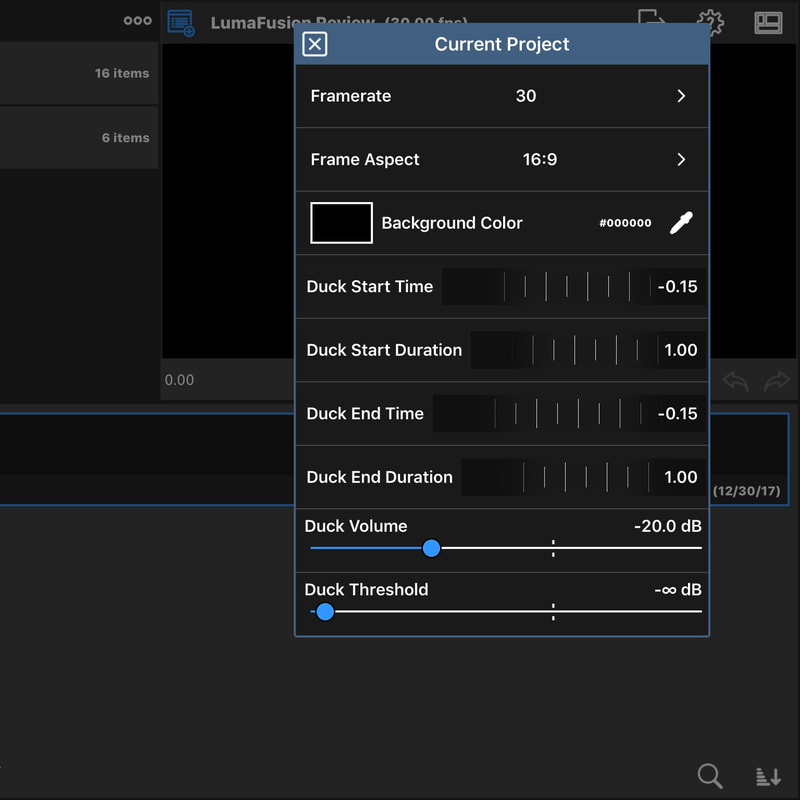
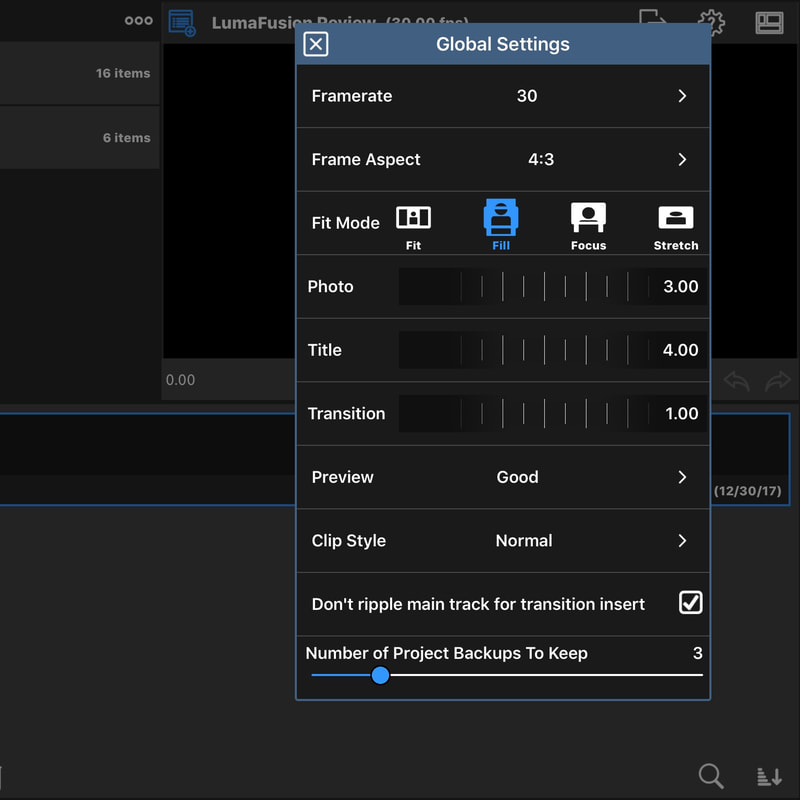
Project and global settings come with presets that enable you to define the parameters of your projects ahead of time. Accessed by selecting the settings icon in the top right, project settings include frame rate, frame aspect, background color, duck start time, duck start duration, duck end time, duck end duration, duck volume, and duck threshold. Global settings apply to all project settings, including frame rate, frame aspect, fit mode, durations for photos, titles, and transitions, preview quality, and clip style. Additional settings include options to not ripple main track when inserting transitions, and setting the number of projects to be backed up. In addition to project and global settings, the help menu provides access to tutorial videos, a reference guide, customer support (link to company website), emailing the developers, app store reviews, and the option to show touches when tapping on the screen, which can be useful when sharing or recording your screen.
Project and global settings come with presets that enable you to define the parameters of your projects ahead of time. Accessed by selecting the settings icon in the top right, project settings include frame rate, frame aspect, background color, duck start time, duck start duration, duck end time, duck end duration, duck volume, and duck threshold. Global settings apply to all project settings, including frame rate, frame aspect, fit mode, durations for photos, titles, and transitions, preview quality, and clip style. Additional settings include options to not ripple main track when inserting transitions, and setting the number of projects to be backed up. In addition to project and global settings, the help menu provides access to tutorial videos, a reference guide, customer support (link to company website), emailing the developers, app store reviews, and the option to show touches when tapping on the screen, which can be useful when sharing or recording your screen.
FROM LEFT TO RIGHT: SETINGS, HELP, PROJECT SETTINGS, GLOBAL SETTINGS
Flexible Layouts
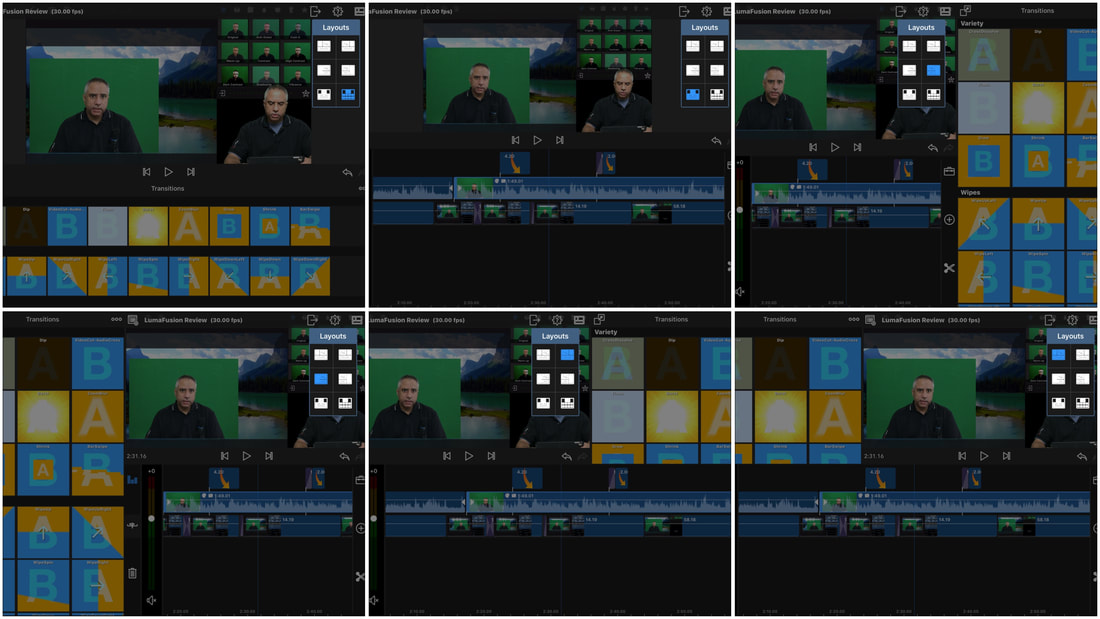
The browsers follow a standard format for viewing and editing content, adding resources, and managing projects, but LumaFusion does not limit you in terms of how you choose to structure these layouts. For example, in the far right corner, you will find a layout icon with a drop down menu that offers six different ways to position your browsers. In addition to the flexible layouts, LumaFusion comes with a responsive design, which will automatically scale and position your browsers when changing back and forth between horizontal and vertical formats.
FLEXIBLE LAYOUTS
Starting a New Project
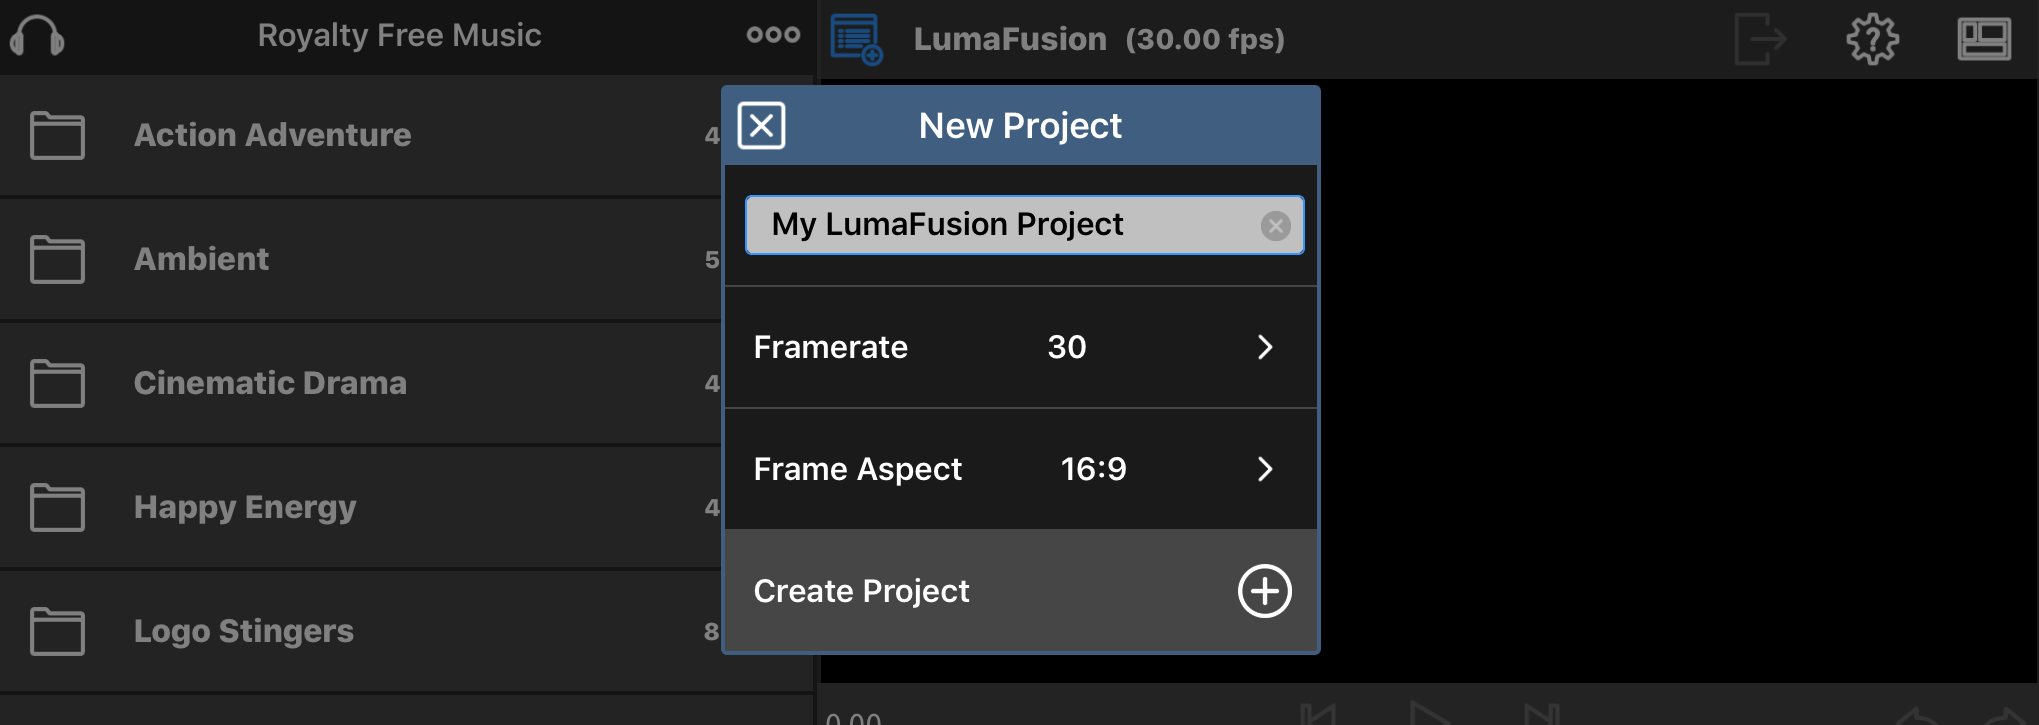
Upon creating a new project, you will receive a dialog window prompting you to add a name to your project, the frame rate, and frame aspect. The default frame rate and aspect ratio reflect what was set up in global settings. The default project settings can be changed during this initial set up or at any time in the project settings. Select the plus (+) or "Create Project" to begin.
NEW PROJECT WINDOW
Source Library
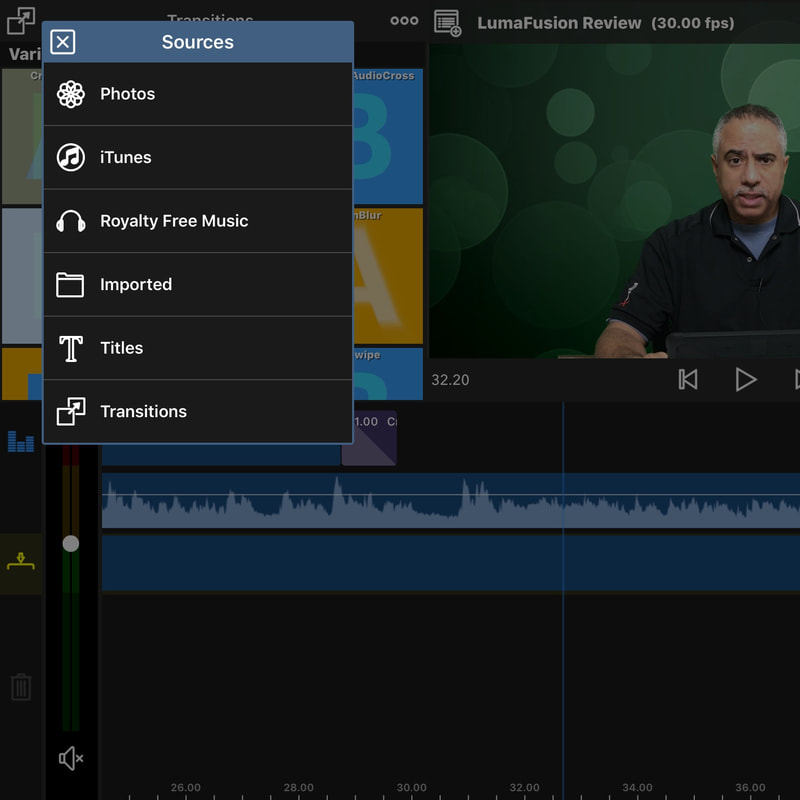
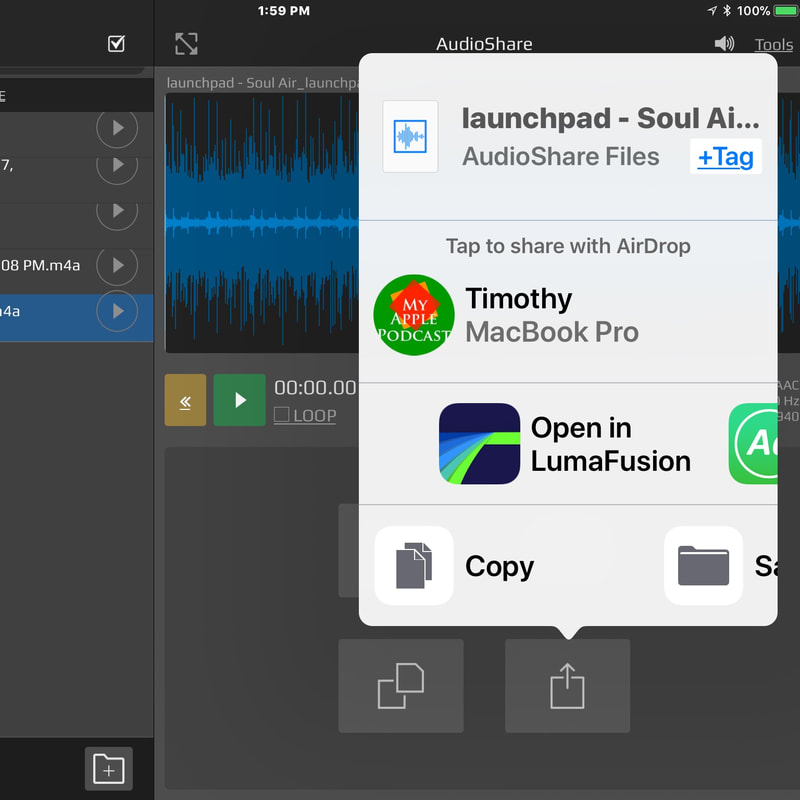
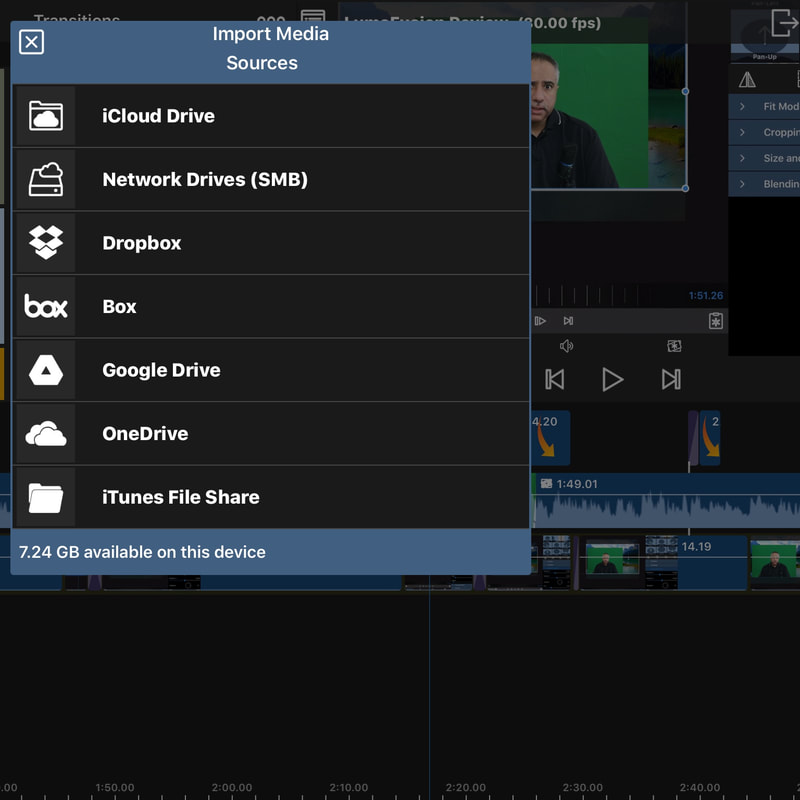
The fun part about video editing is adding content and LumaFusion offers a nice menu of options for adding a variety of sources, including some that come pre-installed. Once you create a new project, you can proceed by adding sources or media to the timeline. The source browser includes photos (photos and videos stored on your iPad), iTunes (unprotected music downloaded from the cloud and stored locally on your device), imported (files added to LumaFusion from third-party applications and cloud-based services); and royalty free music, titles, and transitions - three essential asset portfolios that come preinstalled inside the app. Imported sources can be added by exporting files from third party apps like AudioShare, Filmic Pro, or Pixelmator using the inter-app share option and selecting LumaFusion as the destination. You can also import media by selecting the three dot menu icon adjacent to the project window icon and add content from various cloud-based services, such as iCloud Drive, Network Drives, Dropbox, Box, Google Drive, OneDrive, and iTunes File Sharing. In the latest version of iOS 11, iCloud Drive also serves as the central portal for accessing content in all cloud based locations, otherwise known as the Files App.
LEFT: SOURCE BROWSER; CENTER:: APP EXPORT; RIGHT: IMPORT FROM CLOUD-BASED SERVICES
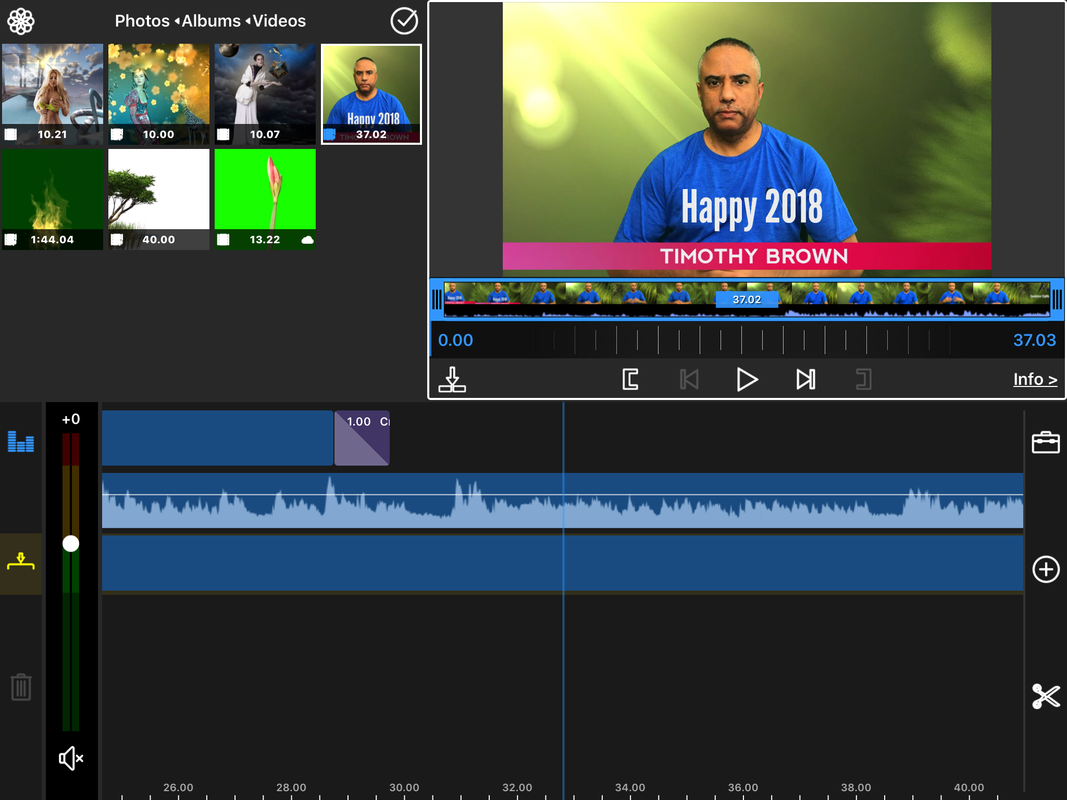
Before you add any content to the timeline, assets can be previewed and trimmed in the viewer window. Media can then be added to the timeline by selecting the down arrow button in the bottom left corner of the viewer window, manually dragging the media thumbnail with your finger or stylus to the timeline, or double-tapping on the media source to drop it in place. If you trim a video clip while still in the source browser, but refrain from adding it to the timeline, LumaFusion will preserve those settings in case you return to the file later on.
LEFT: PREVIEW BROWSER; RIGHT: TIMELINE TOOLBOX
Timeline Editor
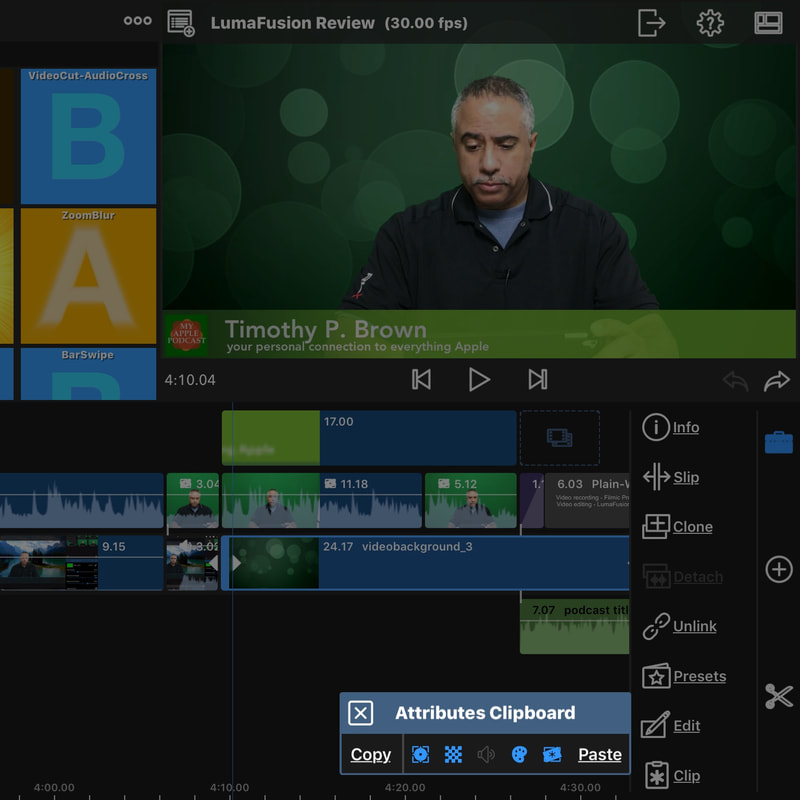
The greatest limitation you will find with video editors for mobile devices is the limited number of tracks available. LumaFusion, however, allows for six media tracks (3 for visual media and 3 for audio). The tracks for visual media can consist of three video files or a combination of videos, photos, and title tracks. The three audio tracks can include soundtracks, narrations, and/or audio tracks detached from video clips. On the right side of the timeline, a scissor tool provides a quick way to split clips (or tap on a clip with two fingers on each side of the playhead) and the circular plus tool as a quick add-in feature that enables you to insert voice overs, transitions, titles, and blank clips.
The Toolbox
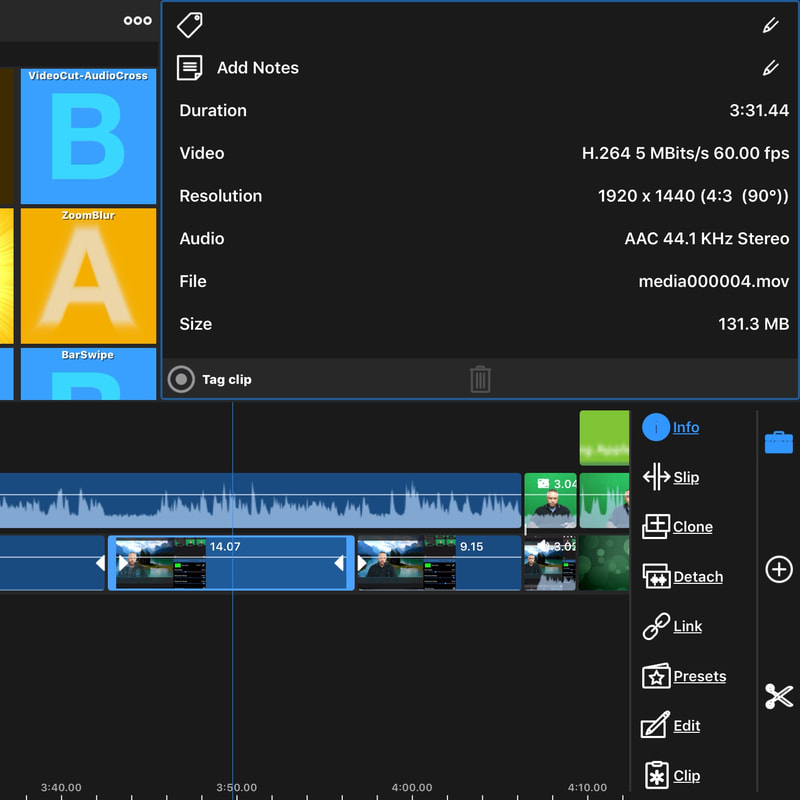
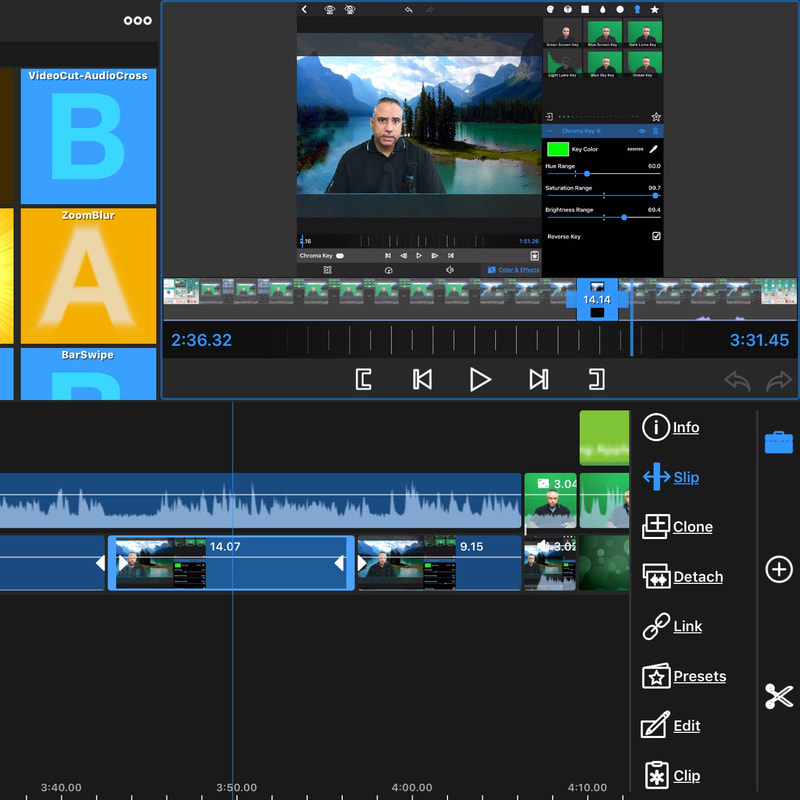
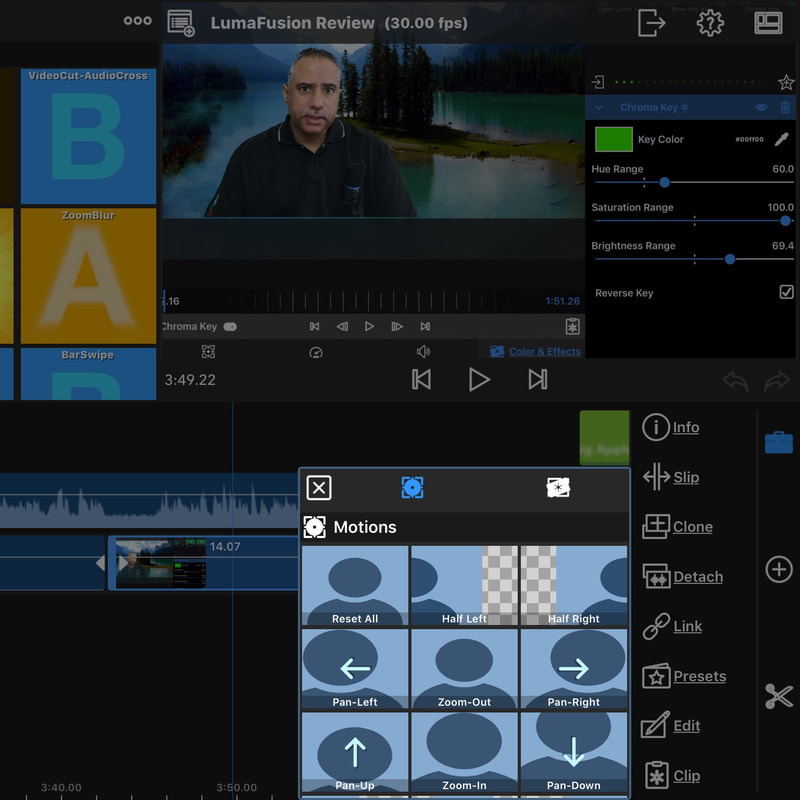
The toolbox is another very handy component that gives easy access to some unique features: info, slip, clone, detach, link, presets, edit, and clip. The info option shows the metadata associated with each individual clip (duration, codec, fps, resolution, audio, file, and size), and includes several input options for naming, tagging, and adding notes to your clips. Slip allows you to adjust the in and out points of your media source files in a manner similar to the source preview browser. Clone duplicates any existing clip on the timeline and places it above or adjacent to the clip selected. Detach removes the audio from an existing video clip and places it on a separate audio track. This technique is helpful when making J and L cuts* Links can be added to clips above the main timeline to secure their relative positioning (click "unlink" to remove it). Presets allow you to quickly add motions such as "pan-right" or "zoom out." and effects like "vignettes" and "gaussian blurs." Edit takes you into full scale editing mode, which can also be accessed by double-tapping on a clip in the timeline). Clip opens the Clip Attributes panel, which gives you the option to selectively copy and paste particular actions such as opacity, color, audio, and effects.
*In a J cut, the sound of the next scene precedes the image and in an L cut, the picture continues but the sound changes.
*In a J cut, the sound of the next scene precedes the image and in an L cut, the picture continues but the sound changes.
FROM LEFT TO RIGHT: INFO, SLIP, EDIT, AND ATTRIBUTES CLIPBOARD
Audio Mixer and Overwrite Tool
On the left side of the timeline is a live audio mixer, an overwrite tool, and a trashcan icon. The audio mixer contains three audio tracks for video and three for soundtracks and narrations. To the left of the mixer is a Volume Unit (VU) meter for displaying representational signals. Individual tracks levels can be adjusted or muted entirely, including the master volume controller - all of which can be used in real time. The insert/overwrite tool enables you to perform three types of edits: inserts, replacements, and overwrites. Inserts occur when files are added to the timeline where the cursor is positioned. This will push any existing content further down the timeline. Clips can also be manually added as inserts; a bracketed insert image will appear at the juncture where the file is being placed. You can change the insert icon to overwrite mode and a yellow translucent band will appear across the main timeline. This will enable you to overwrite any existing content. Replacing content is done in the original insert mode by simply dragging a clip on top of an existing one, waiting for the brackets to appear, and dropping the replacement clip in place. The trashcan is used to delete any content from the timeline, although you can also drag a file to the viewer window to remove it as well.
Editor
What's great about the toolbox and audio mixer is the convenient access you have to editing content without leaving the browser area. Yet, LumaFusion offers yet another menu of controls and effects to extend the quality of your creations. Accessed by double tapping on a clip or selecting edit in the toolbox, the tools that are divided into four main areas: Frame and Fit, Speed and Reverse, Audio, and Color and Effects.
Frame and Fit
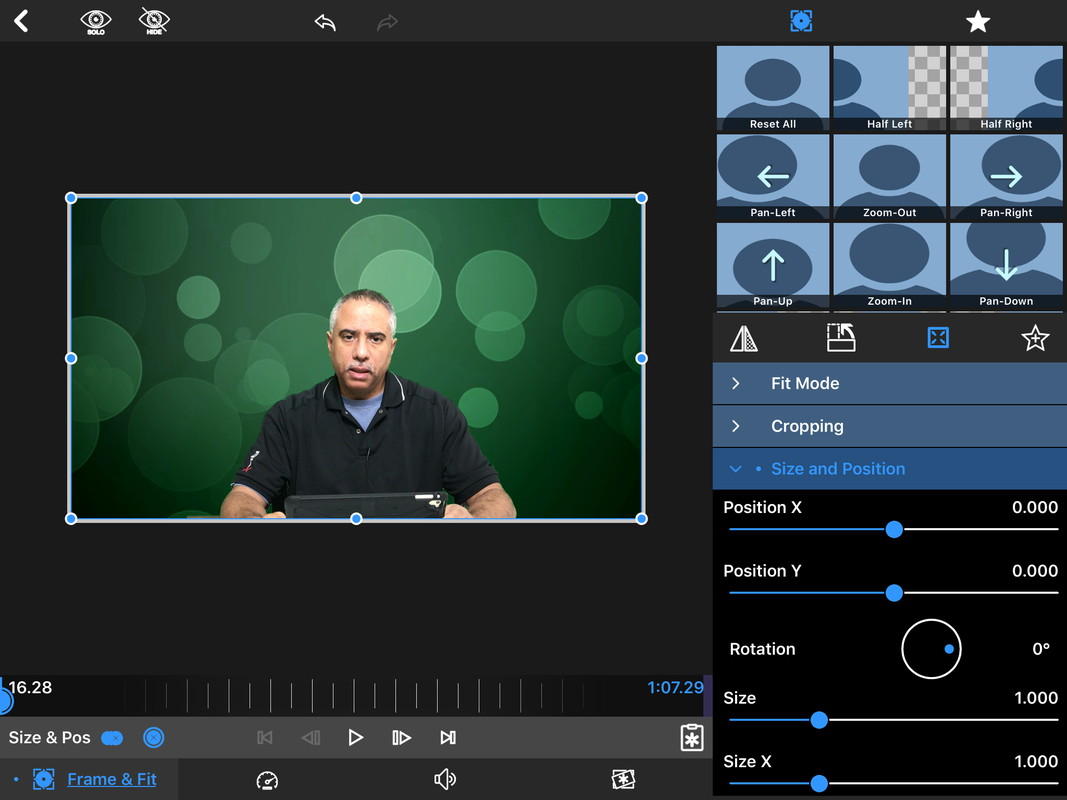
Frame and Fit includes preset motions (also accessed from the timeline toolbox editor), consisting of half-left, half-right, pan-left, pan-right, pan-up, pan-down, zoom-in, zoom-out, and a reset button. This section also includes Fit Mode for defining how you want your content to fill the screen; Cropping for adjusting the left, right, top, and bottom sides of your media clips; Size and Position for adjusting the X Y coordinates or positioning of your objects; and Blending for controlling the opacity. Cropping, Size and Position, and Blending can be added at different points on the timeline by using key frames.
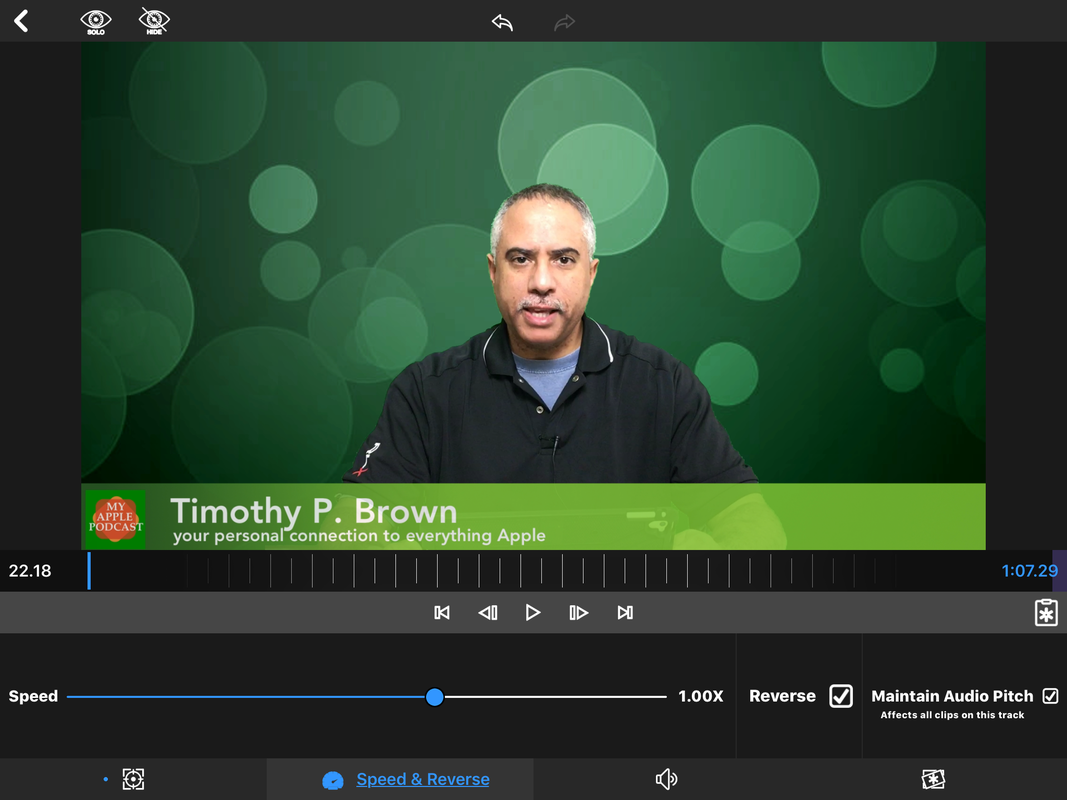
LEFT: FRAME AND FIT, MOTION PRESETS, FIT MODE, CROPPING, SIZE AND POSITION; RIGHT: SPEED AND REVERSE
Speed and Reverse
Unlike photo stills, video and audio clips can be adjusted by changing the speed from 1/24th to four times the normal speed. Additional options are available to reverse the direction of a clip and to maintain audio pitch.
Audio
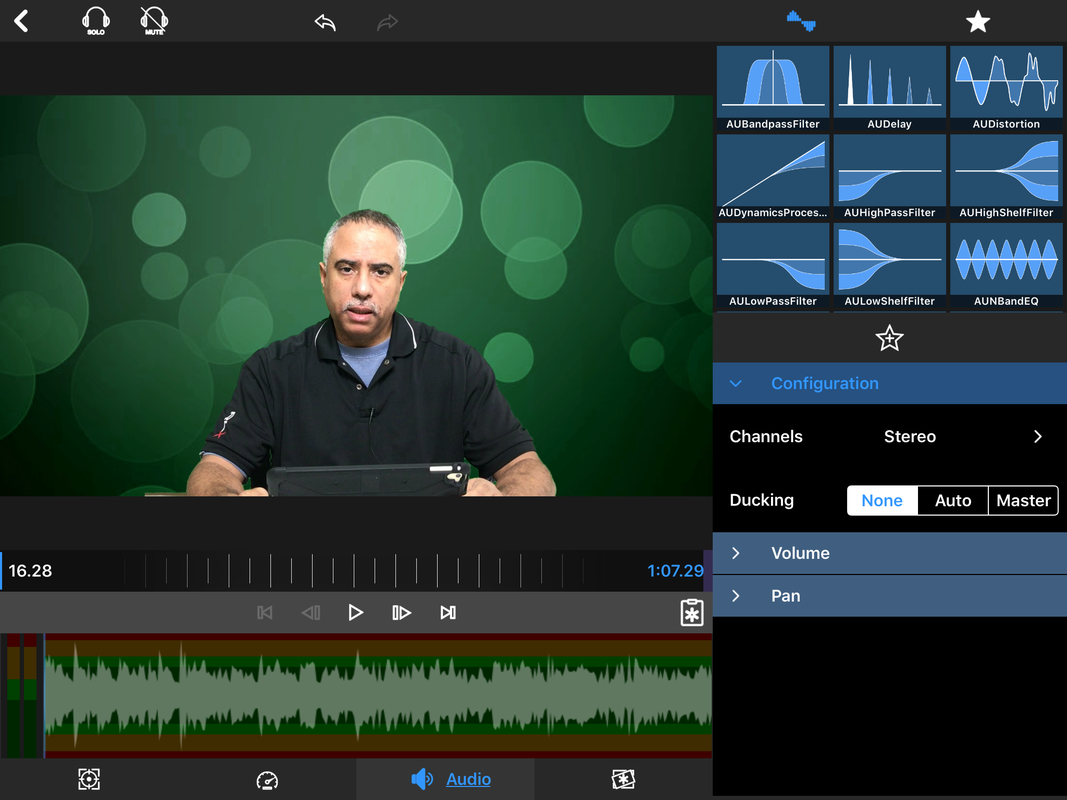
Audio comes with a variety of controls and effects for customizing your audio output. Immediately to your bottom left, you will see a waveform of your audio file and a toggle on/off button for key frames. At the top right, LumaFusion offers nine Audio Units (AU) that enable you to add distortions, delays, high pass/low pass (to attenuate frequencies), low shelf/high shelf filtering (for more gradual changes above or below target frequencies) and EQ adjustments for controlling gain, frequencies, and bandwidth. Immediately below the AU filters is a configuration option for controlling audio ducking, as well as controls for volume and pan. Audio filters, volume levels, and panning can employ the use of key frames to mark specific changes or adjustments in the timeline.
Key Frames
As referenced earlier, Frame and Fit, Audio, and Color and Effects all come with the ability to use key frames. Key frames enable you to mark specific points on the timeline where you want an action to occur. For example, when using the size and position option, key frames can be added at different points in the timeline to indicate a shift in positioning from the left to the right of the viewer window and/or change in size from small to large. A timeline navigation wheel helps you to navigate through your content and a toggle on/off button is used to set key frames. Once key frames are toggled on, LumaFusion will recognize any subsequent change in positioning, size, sound level or effect that occurs in the timeline and insert a keyframe automatically to correspond with the change. To refine this process even more, arrow keys are available below the timeline scrubber to help you navigate content more incrementally or by key frame.
Color and Effects
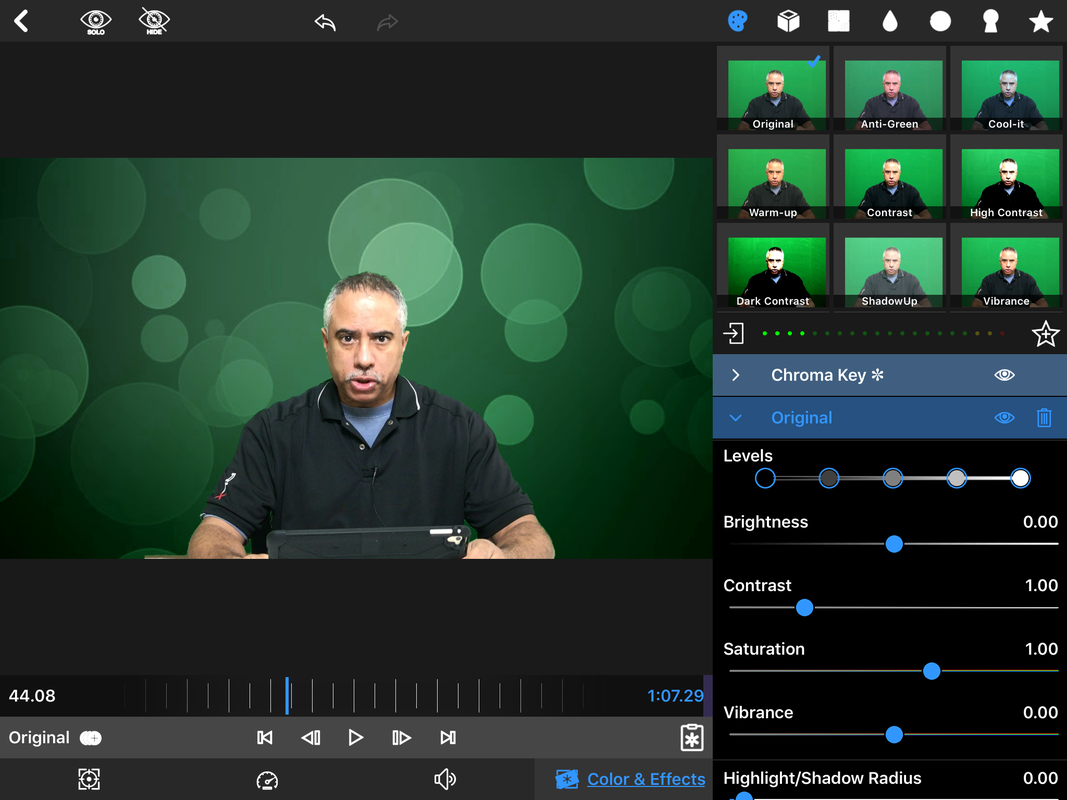
The Color and Effects panel is where you can greatly expand the visual appeal of your content. Located at the top right by default, color and effects are divided into six sections. The palette icon contains 45 menu options which can be used to make adjustments to brightness, contrast, saturation, hue, and tint. While these basic controls can be found under the "original" tab, the other options like "Shadow Up" and "Dream" function as presets for producing a specific effect more quickly. When choosing a preset option, the control sliders for brightness, contrast, saturation, etc. will be repositioned accordingly to coincide with the desired effect. The cube icon contains color gradients and Look Up Tables (LUTS), some of which are derived from Filmic Pro's library. These veils of color can help create a warm or cool mood, make an image stand out, appear soft, or have a vintage look. The square icon contain a variety effects generally associated with graphic reproduction. For example, 39 presets enable you to add effects ranging from, comic, abstract, and litho effects to vignettes, blooms, and cross hatching. The tear drop icon represents a range of blur effects, such as, gaussian, box, motion, and swish blurs, joined by various options for controlling sharpness. The circle icon contains 42 addition effects that deconstruct your image in the form of crystals, op art, mirrors, reflection, kaleidoscope, pixelation pointillism, twirling, pinching, and bumping effects.
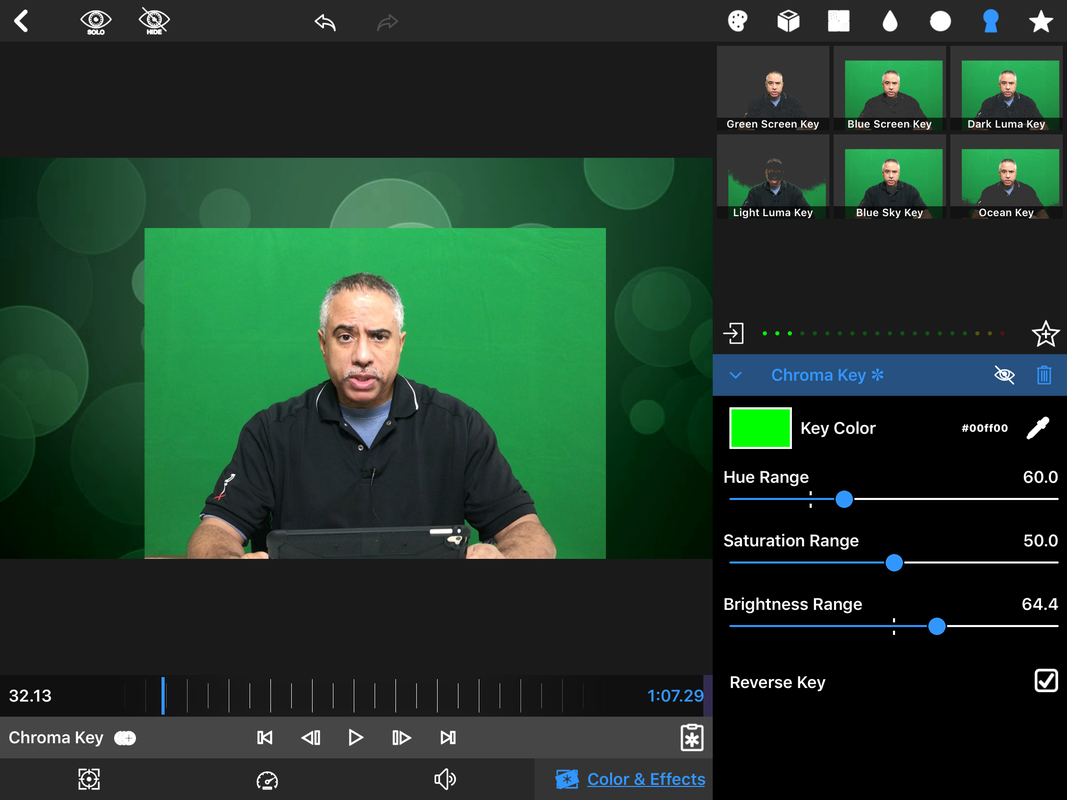
LEFT: COLOR AND EFFECTS; MIDDLE: AU FILTERS; RIGHT: CHROMA KEY EDITOR
Chroma and Luma Keys (Beta)
The latest addition to the color and effects menu is the key icon or chroma/luma key. This menu option contains six different ways for keying out areas of your content: Green Screen Key, Blue Screen Key, Dark Luma Key, Light Luma Key Blue Sky Key, and Ocean Key. Blue and Green Keys are designed specifically to key out color, Luma Keys, for keying out darkness and lightness, and Blue Sky and Ocean for keying phenomena is natural settings. Each key can be fine tuned by making adjustments to the hue, saturation, and brightness range and/or by modifying the selection in the key color picker.
Underneath the menu pane of each item featured in Colors and Effects is an import icon on the left for adding presets and LUTS sources from cloud services, and a star icon on the right for accessing saved effect presets.
Underneath the menu pane of each item featured in Colors and Effects is an import icon on the left for adding presets and LUTS sources from cloud services, and a star icon on the right for accessing saved effect presets.
Exporting Projects
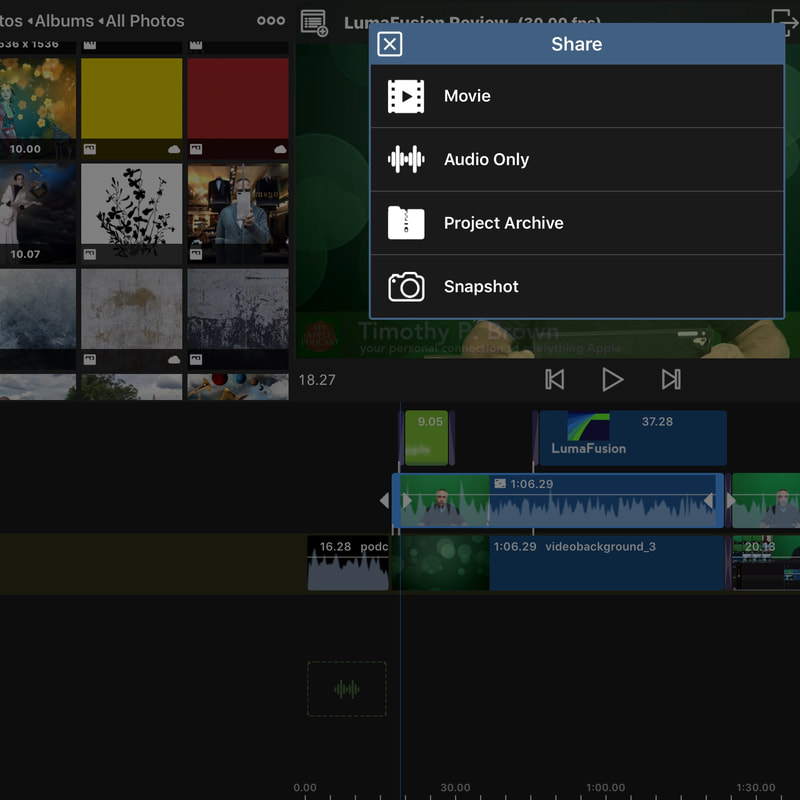
Once you are finished with your edits and you are ready to share your creations with the world, you have four export options available: movie, audio only, project archive, or snapshot.
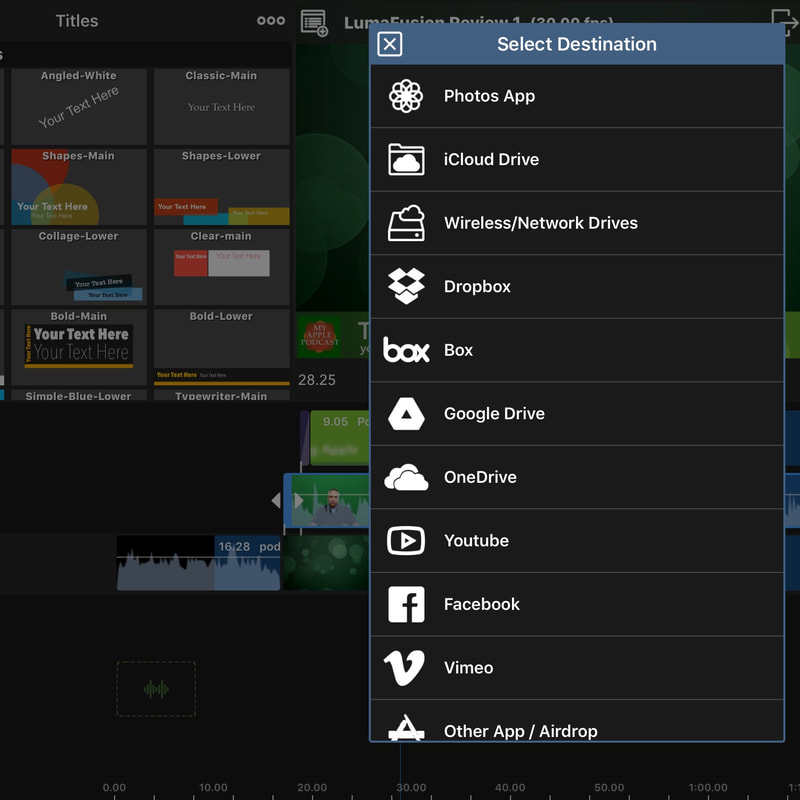
LEFT: EXPORT OPTIONS; RIGHT: EXPORT DESTINATIONS
- MOVIE
When you select the Movie export option, you will have a wide range of destinations to choose from: Photos App, iCloud Drive, Network Drives, Dropbox, Box, Google Drive, OneDrive, YouTube, Facebook, Vimeo, Other App/Airdrop, Rendered Movies Folder and iTunes File Sharing. Once you choose your destination, you will have the option to adjust the resolution, frame rate, and video quality, along with advanced settings that include video and/or audio, audio quality, file format, 360 VR, and export information. - AUDIO ONLY
When choosing Audio Only as an export option, you are likewise presented with the same export destinations, minus the Photos Library which cannot store audio files. Adjustments to audio exports can be made to the audio quality (set at 44.1KHz by default), ranging from 16 to 48KHz, and two options are available for audio file formats, Apple's M4a Audio Format and Wave Audio (.wav). - PROJECT ARCHIVE
Project Archives can be saved to any cloud destination, which means that all of your project assets and edits can preserved in toto. This is a very attractive and useful option for backing up your projects, especially if you discover that the new consolidation feature in the project browser is taking up too much space on your iPad. The share settings provide an option to save the full original media files or have them trimmed for a smaller project size. - SNAPSHOT
Snapshot captures a still image from any point on the timeline and is shared automatically to the camera roll. No other destinations are provided for this feature.
Conclusion
The developers at LumaTouch have designed the best video editor for iOS that can perform a complex array of functions. They have also given careful thought to the user interface, incorporating flexible layouts, gesture controls, responsiveness to vertical and horizontal formats, and universal access to both iPhones and iPads. Considering the breadth and scope of LumaFusion, it is not only the best video editor for iOS, it contains features that rival, if not, surpass some desktop editors. It may not match the capacity of desktop editors like Final Cut Pro, but the power of LumaFusion, relative to the mobile platform it's designed for, ranks it as an exceptional application for video editing. LumaFusion is currently available in the App Store for $19.99 and does not require monthly or yearly subscriptions. Try it out. You won't be disappointed.
The LumaTouch Team
Terri Morgan, Co-Founder, Product Design; Chris Demiris, Co-Founder, Engineering; Androu Morgan, Testing, Support, Consulting.
To learn more visit the LumaTouch website or check out the their YouTube channel for helpful tips and tricks.
