|
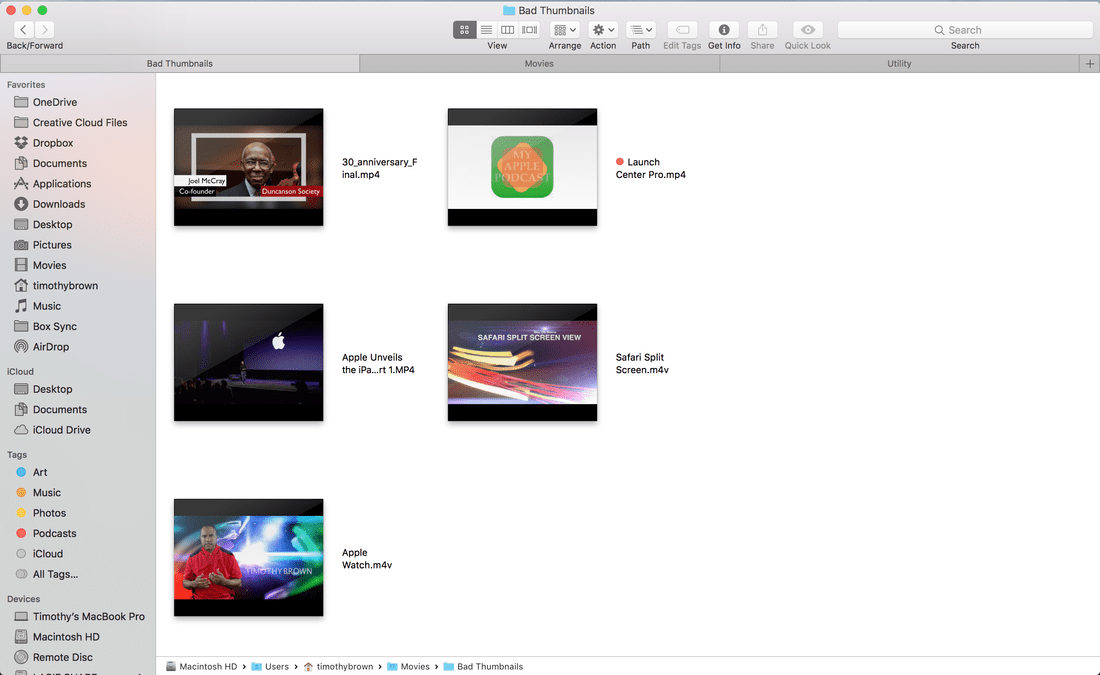
If you are like me and you happen to have a lot of video files on your computer, you may also have a lot of thumbnails in file folders that have unattractive images associated with them or vague images that have black horizontal bands going down the sides - images that make it very hard to determine what the video is about. Sound Familiar?
Well, there is an easy way to fix this problem and it does not require additional software to do it and it only takes a matter of seconds. Open up the file in question using the native Quicktime application on your Mac (I usually drag the video on top of the Quicktime App on the dock). Use the slider on the movie player to select a scene in the movie you would like to become the thumbnail. Go to edit and select copy or press command + c on your keyboard. This will copy the video still image to the clipboard.
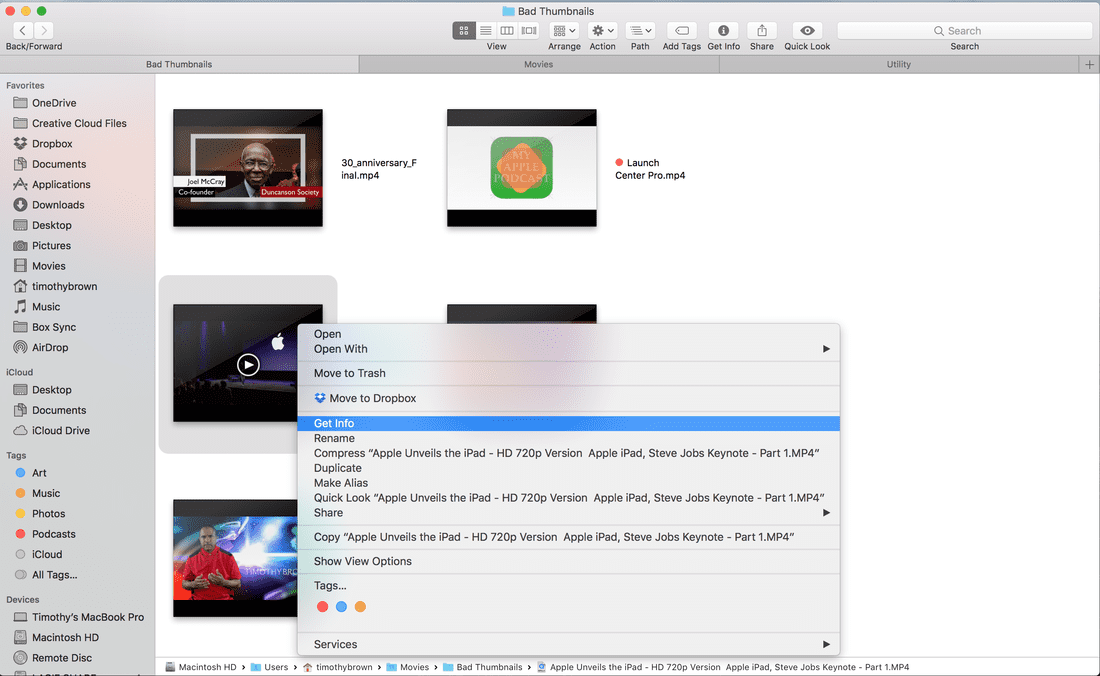
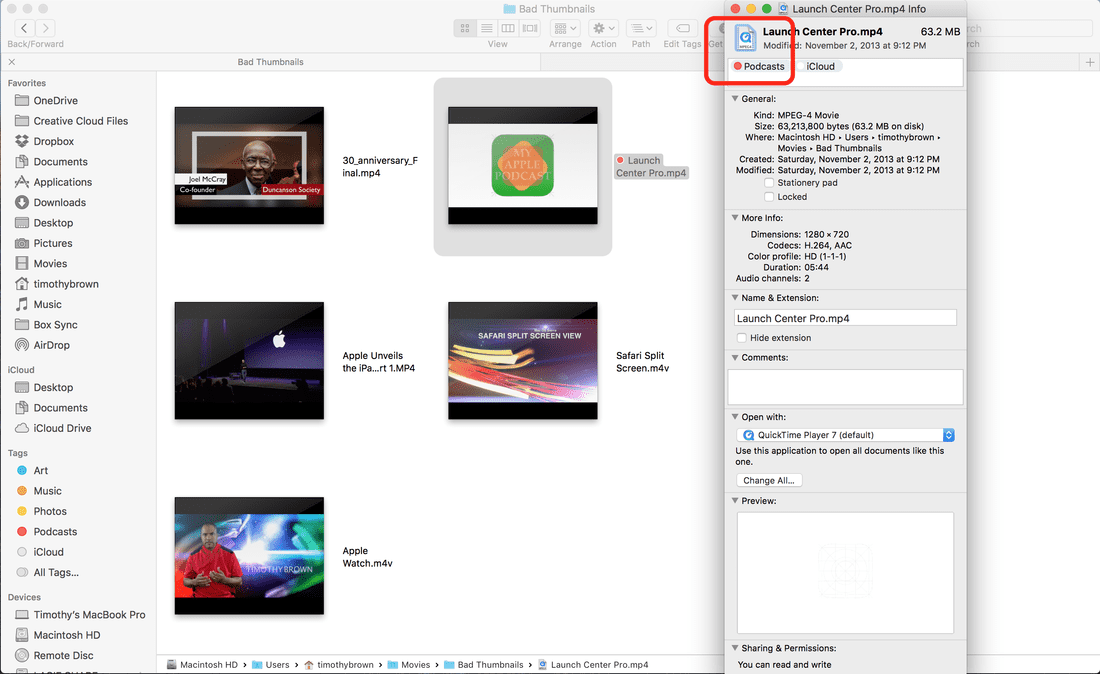
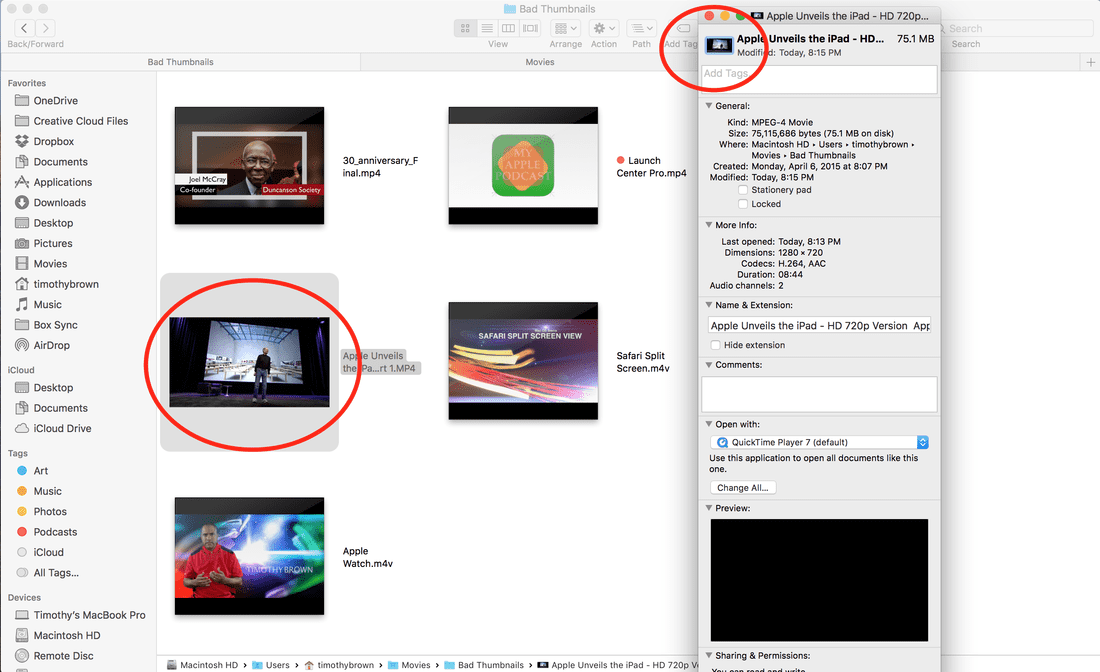
Next, use your cursor to select the video file in question and right click or select control and tap on your trackpad to bring up a pop-up menu. When the menu opens select “get info.” At the top left corner, you will see a tiny thumbnail and the title of the file to the right (the thumbnail usually shows the quicktime logo). With the thumbnail selected, press command v on your keyboard to paste the clipboard image into the thumbnail. Once you have done this, you will notice that your video file has a brand new thumbnail with no black borders along the side.
0 Comments
Leave a Reply. |

AuthorMy name is Timothy Paul Brown and I'm the host and chief editor for My Apple Podcast. Archives
September 2017
Categories |
 RSS Feed